I just replied to a comment by middleendian’s blog on a post from last August asking about the AlgorithmIdentifier argument used for the various SubtleCrypto methods. That argument is different for different methods and different algorithms, and it’s not clear when you start what it should be in each case. My reply points the parts of the specification that tell you the answer for that. I also point out the Web Cryptography Resources page I have on my web site that try to point out where to find this kind of detail.
June 29, 2015
March 6, 2015
Where Can You use the Web Cryptography API Today?
[Update March 6: it turns out that Firefox does support PBKDF2 on all platforms, but only with SHA-1. I had only tested with SHA-2 hashes so I missed it. I’ve updated the table.]
I tested out all the examples I’ve blogged about here in pretty much every web browser I could get on Linux, Windows, OS/X and Android. I also ran Daniel Roesler’s webcrypto-examples test page on them all. I put what I found in a spreadsheet you can view.
The short version is that RSA-PKCS1-v1_5 for digital signatures, RSA-OAEP for public key encryption, AES-CBC and AES-GCM for symmetric encryption, HMAC, and SHA-1 and SHA-2 hash functions are pretty much universally supported. You can use 1024, 2048 or 4096 bit keys for the public key algorithms, and 128 and 256 bit keys for symmetric encryption safely, but Blink-based browsers do not support 192-bit keys. And in the test browser, spki and pkcs8 export formats are available for key pairs, and raw for AES keys. You can build lots of useful crypography-based applications with those.
The most disappointing omission to me is the lack of any key derivation functions in any current stable browsers I tried. PBKDF2 does work in Chrome Canary everywhere and Opera Developer on Windows, though, so they should be in stable versions pretty soon. I hope other browsers follow soon because there are a lot of cases where we want the user to be able to remember a key instead of store one, and deriving it from a password (or pass phrase) is the only realistic way for a person to do that.
I’m sure a lot of people will be disappointed with the lack of elliptic curve algorithm support, too, but the news is better there. Every browser supports them on at least one platform, at least on their developer early releases, so it’s reasonable to expect them to be universally available soon.
The upshot is that less than three months after reaching Candidate Recommendation status, the Web Cryptography API is already gaining wide and complete support. Microsoft’s Windows 10 preview edition includes a version of Internet Explorer with partial support of the current API (older versions of IE supported an early version of the API that is quite different from the eventual one), so they are clearly planning full support. Apple’s Safari has a prefixed version that looks very compatible with the current specification, though algorithm support and import/export formats are still spotty. So we should be able to use those browsers eventually, too.
March 3, 2015
Creating X.509 Certificates with Web Crypto and PKIjs
I wrote a couple of posts last fall looking into working with X.509 certificates. Doing so requires a lot of very detailed, complicated bit and byte twiddling, and as a result I got so discouraged I went nearly four months without posting again. But I’m ready to tackle it again.
What’s changed? I found the PKIjs and ASN1js JavaScript libraries from GlobalSign. They are built on top of the Web Cryptography API and deal with the painstaking work of handling ASN.1 data and the various PKI related standards so I don’t have to. They are also from a company that has been working with these technologies for almost 20 years, so I have a lot more confidence that their code is doing it right than I would with new code I wrote. The author of the library is Yuri Strozhevsky (Юрий Строжевский). I’ve been in touch with him and he’s very knowledgeable and helpful.
I used the PKIjs library along with web crypto to create self-signed X.509 certificates. Having certificates signed by a separate CA would involve the same steps, just using a separate private key for the final signing. I found using the PKIjs library to still be fairly difficult, mainly because of the innate complexity of the X.509 standard. It also looks like it’s structured for a strongly typed language, not a dynamic one like JavaScript.
What the User Sees
Since it’s tricky to use, I’m going to go over the example in this post. Here’s what the web page looks like when it’s first opened:

The user will enter the identifying information needed for the certificate, click a button, and then see the PEM forms of the created certificate, public key, and private key, along with download links for them. Source code for this example is available on GitHub, and you can try out a live version, too.
Application Structure
The JavaScript waits for the page to be loaded, checks to see that the needed API is available, and attaches a click listener to the button. In addition, there is new code that checks for the API being available under Apple’s window.crypto.webkitSubtle prefix instead of window.crypto.subtle, and points window.crypto.subtle at that if needed. However, Apple Safari’s implementation of the API is still not complete, so this example won’t work there as of March 2015.
document.addEventListener("DOMContentLoaded", function() {
    "use strict";
    if (window.crypto && !window.crypto.subtle && window.crypto.webkitSubtle) {
        window.crypto.subtle = window.crypto.webkitSubtle;
    }
    if (!window.crypto || !window.crypto.subtle) {
        alert("Your browser does not support the Web Cryptography API! This page will not work.");
        return;
    }
    document.getElementById("create-certificate").addEventListener("click", createCertificate);

    // Click handler and helper functions go here
}
The click handler is fairly simple: get and check the input fields, then generate a key pair and use it to build a self-signed certificate. The general structure follows:
    function createCertificate() {
        var keyPair;
        var commonName       = document.getElementById("common-name").value;
        var organization     = document.getElementById("organization").value;
        var organizationUnit = document.getElementById("organization-unit").value;
        var countryCode      = document.getElementById("country-code").value;
        if (!commonName) {alert("You must enter a name for the certificate."); return;}
        if (countryCode.length !== 2) {
            alert("Country codes must be two characters long."); return;
        }
        countryCode = countryCode.toUpperCase();

        // Chain of promises that does all the work goes here
In plain language, the chain of promises does the following:
- Create a new RSASSA-PKCS-v1_5 key pair for the certificate
- Save the key pair in keyPair for later reuse
- Create a PKIjs certificate object with the input fields and the key pair
- Convert the certificate object to PEM format and insert it into the page. Also export and convert the public and private keys to PEM and insert them in the correct parts of the page.
In JavaScript, that turns out to be:
        window.crypto.subtle.generateKey(
            {
                name: "RSASSA-PKCS1-v1_5",
                modulusLength: 2048,
                publicExponent: new Uint8Array([1, 0, 1]),
                hash: {name: "SHA-256"}
            },
            true,   // Must extract private key to create PEM files later
            ["sign", "verify"]).
        then(function(newKeyPair) {
            keyPair = newKeyPair;
            return keyPair;
        }).
        then(function(keyPair) {
            return buildCertificateObject(commonName, organization, organizationUnit, countryCode, keyPair);
        }).
        then(function(cert) {
            // Convert everything to PEM and insert into page
        }).
        catch(function(err) {
            alert("Error creating certificate: " + err.message);
        });
The only new things here are the buildCertificateObject call and the steps to convert everything to PEM to place into the page.
Building the Certificate
The heavy lifting is all done inside buildCertificateObject:
    function buildCertificateObject(commonName, organization, organizationUnit, countryCode, keyPair) {
        var cert = new org.pkijs.simpl.CERT();

        setSerialNumber(cert, Date.now());
        setSubject(cert, countryCode, organization, organizationUnit, commonName);
        setIssuer(cert, countryCode, organization, organizationUnit, commonName);
        setValidityPeriod(cert, new Date(), 730);  // Good from today for 730 days
        setEmptyExtensions(cert);
        setCABit(cert, false);
        setKeyUsage(cert, true, true, false, false, false, true, true); // digitalSignature, nonRepudiation, keyCertSign, cRLSign
        setSignatureAlgorithm(cert, "1.2.840.113549.1.1.11"); // RSA with SHA-256

        return setPublicKey(cert, keyPair.publicKey).
            then(function() {return signCert(cert, "1.2.840.113549.1.1.11", keyPair.privateKey)}).
            then(function() {return cert});

        // Helper functions go here
    }
The function starts by creating an empty org.pkijs.simple.CERT object, and then it fills in the information needed in the certificate: serial number, subject (the person holding the certificate), issuer (same as subject for the self-signed certificate), validity, extensions for certificate authority and key usage, and the code for the signature algorithm. It finishes by setting the public key portion of the certificate (which requires exporting the public key created earlier, so is a Promise), then signing the certificate, and passing the signed certificate on to the following then method.
The serial number is any number, but should be unique for each issuer. This code uses the number of milliseconds since January 1, 1970. Unless we issue two certificates within a millisecond of each other, this should guarantee uniqueness.
The subject and issuer are identified by a variety of strings including the common name and country code. Organization and organizational unit can also be provided.
The validity period is the first and last times the certificate is valid. The code sets them to the current day and 730 days later.
Certificate extensions are optional, but we are using two of them here: one to state that this certificate should not be used by a certificate authority, and another saying that the certificate can be used for four specific purposes out of seven that can be listed. However, lots of programs ignore the restrictions, so you can’t count on the certificate not being used for other purposes.
The signature algorithm is the object identifier (OID) of the algorithm that this certificate was signed with. The key was created for RSA with SHA-256, so I looked up the registered OID for that and got 1.2.840.113549.1.1.11.
Using PKIjs
I’m not going to show the bodies of all of the helper functions called here. They pretty much just translate the high-level operation being done (such as setting a country code) into the specific operations provided by the PKIjs library. Full source is available on GitHub, and I’m sure the examples will be useful to anyone using the library.
The first helper function sets the serial number:
        function setSerialNumber(cert, serialNumber) {
            cert.serialNumber = new org.pkijs.asn1.INTEGER({value: serialNumber});;
        }
It just sets the appropriate property of the certificate object to an object that represents an ASN.1 INTEGER object. The setEmptyExtensions function is even simple: it creates an extensions property and initializes it to an empty array:
        function setEmptyExtensions(cert) {
            cert.extensions = new Array();
        }
Other functions are more involved, requiring creation of complex objects to insert in the certificate. For example setting the CABit to the boolean value provided requires adding an EXTENSION object to the cert.extensions array. One property of that new object is itself a complicated object, an x509 BasicConstraints object. I could not figure this out from the documentation; I had to see some examples included in the PKIjs library and copy them:
        function setCABit(cert, isCA) {
            var basicConstraints = new org.pkijs.simpl.x509.BasicConstraints({
                cA: isCA,
                pathLenConstraint: 3
            });

            cert.extensions.push(new org.pkijs.simpl.EXTENSION({
                extnID: "2.5.29.19",
                critical: false,
                extnValue: basicConstraints.toSchema().toBER(false),
                parsedValue: basicConstraints
            }));
        }
One thing you’ll see when exploring the full source is the tedious detail that needs to be handled. That’s the nature of X.509 and there seems no way around it. At least the PKIjs library handles all the complex ASN.1 building and encoding for us. It’s an enormous help.
Converting the Results to PEM Format
Once the certificate has been created and signed, the code needs to convert into PEM format, a plain text rendering of the binary data. Building that requires converting the JavaScript certificate object to a binary encoded ASN.1 object, using cert.toSchema(true).toBER(false). That binary data needs to be converted to the plain text PEM format and inserting a standard header and footer line. Once that’s done we can insert the text into the web page, and prepare a download link using a data URI:
            var pemCert = convertBinaryToPem(cert.toSchema(true).toBER(false), "CERTIFICATE");
            var pemUrl = "data:application/octet-stream;charset=UTF-8;base64," + btoa(pemCert);
            document.getElementById("pem-certificate").innerText = pemCert;
            document.getElementById("certificate-download").setAttribute("href", pemUrl);
The public and private keys can also be put into PEM format by exporting them to spki or pkcs8 binary format, respectively, then converting to PEM:
            window.crypto.subtle.exportKey('spki', keyPair.publicKey).
            then(function(spki) {
                var pemPublicKey = convertBinaryToPem(spki, "PUBLIC KEY");
                var pemUrl = "data:application/octet-stream;charset=UTF-8;base64," + btoa(pemPublicKey);
                document.getElementById("pem-public-key").innerText = pemPublicKey;
                document.getElementById("public-key-download").setAttribute("href", pemUrl);
            });

            window.crypto.subtle.exportKey('pkcs8', keyPair.privateKey).
            then(function(pkcs8) {
                var pemPrivateKey = convertBinaryToPem(pkcs8, "PRIVATE KEY");
                var pemUrl = "data:application/octet-stream;charset=UTF-8;base64," + btoa(pemPrivateKey);
                document.getElementById("pem-private-key").innerText = pemPrivateKey;
                document.getElementById("private-key-download").setAttribute("href", pemUrl);
            });
Actually converting a binary ArrayBuffer into a printable PEM string is the job of convertBinaryToPem. That starts by creating a standard header line, then the base64 encoded version of the ArrayBuffer, broken into lines no longer than 64 printable characters each, then a standard footer line. The PEM specification also says that lines should be terminated with CF-LF, not just LF. The code to do this is:
    function arrayBufferToBase64String(arrayBuffer) {
        var byteArray = new Uint8Array(arrayBuffer)
        var byteString = '';
        for (var i=0; i<byteArray.byteLength; i++) {
            byteString += String.fromCharCode(byteArray[i]);
        }
        return btoa(byteString);
    }

    function convertBinaryToPem(binaryData, label) {
        var base64Cert = arrayBufferToBase64String(binaryData);
        var pemCert = "-----BEGIN " + label + "-----\r\n";
        var nextIndex = 0;
        var lineLength;
        while (nextIndex < base64Cert.length) {
            if (nextIndex + 64 <= base64Cert.length) {
                pemCert += base64Cert.substr(nextIndex, 64) + "\r\n";
            } else {
                pemCert += base64Cert.substr(nextIndex) + "\r\n";
            }
            nextIndex += 64;
        }
        pemCert += "-----END " + label + "-----\r\n";
        return pemCert;
    }
The only unusual part of this code is converting the binary data in the ArrayBuffer to a JavaScript string, each character of which contains one byte. That’s done so we can use the built in btoa function for base 64 encoding.
Example Output
Here’s the first part of the page when information has been filled in and a certificate created:
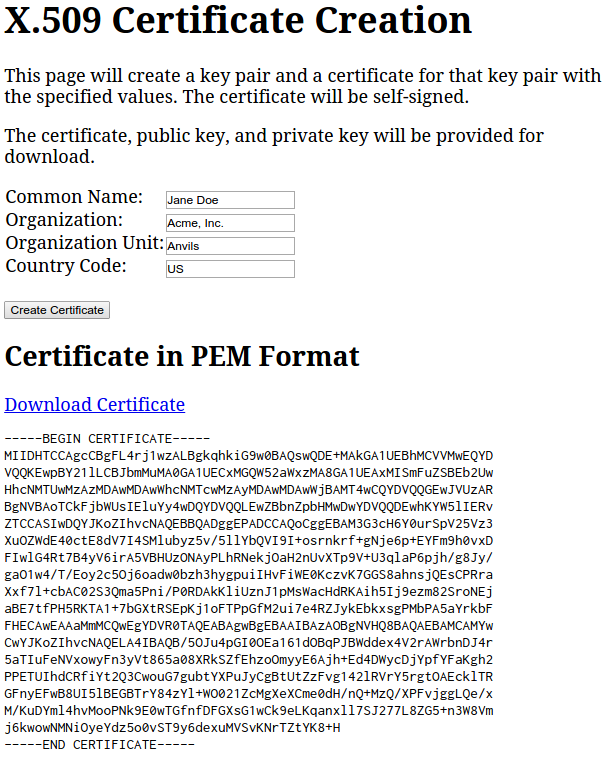
The public and private keys would follow, but didn’t all fit on one screen. I downloaded the certificate and used openssl to display its contents using openssl x509 -in downloaded.cert -inform PEM -text. Here’s a truncated version of what I got:
Certificate:
    Data:
        Version: 1 (0x0)
        Serial Number: 1425411733871 (0x14be128f96f)
    Signature Algorithm: sha256WithRSAEncryption
        Issuer: C=US, O=Acme, Inc., OU=Anvils, CN=Jane Doe
        Validity
            Not Before: Mar  3 00:00:00 2015 GMT
            Not After : Mar  2 00:00:00 2017 GMT
        Subject: C=US, O=Acme, Inc., OU=Anvils, CN=Jane Doe
        Subject Public Key Info:
            Public Key Algorithm: rsaEncryption
                Public-Key: (2048 bit)
                Modulus:
[modulus of public key in binary shown here]
                Exponent: 65537 (0x10001)
        X509v3 extensions:
            X509v3 Basic Constraints:
                CA:FALSE, pathlen:3
            X509v3 Key Usage:
                Digital Signature, Non Repudiation, Certificate Sign, CRL Sign
    Signature Algorithm: sha256WithRSAEncryption
[SPKI format public key in bytes shown here]
-----BEGIN CERTIFICATE-----
[same cert as shown on the page would go here]
-----END CERTIFICATE-----
The various fields we set are all shown here. It looks like we created the certificate successfully. But does this work? Let’s sign a file with the private key and then try to verify it with the certificate. The file is called test.txt, the private key is downloaded.key, and the certificate is downloaded.cert, so we sign it with:
openssl pkeyutl -sign -in test.txt -inkey downloaded.key -out test.sig
There’s no output if it all worked. Then verify it with the certificate:
openssl pkeyutl -verify -in test.txt -sigfile test.sig -certin -inkey downloaded.cert
And we see Signature Verified Successfully.
Conclusion
This pure web application created a key pair and self-signed X.509 certificate for that key pair, and the results are interoperable with OpenSSL. There’s a lot more control you can exercise over the content of the certificate, using the org.pkijs.schema.CERT constructor and related x509_schema.js library, instead of the simple versions used here. But there’s no getting around the need to deal with a lot of exacting details when creating certificates.
March 2, 2015
Apple’s Safari Browser and Web Cryptography
As of this writing Apple’s Safari browser still provides the Web Cryptography API via a prefixed name. Instead of using window.crypto.subtle you would use window.crypto.webkitSubtle. Even though it’s prefixed, it appears very compatible with the latest draft. So here’s a code snippet you can add to make working with both Apple and non-Apple browsers easier:
if (window.crypto && !window.crypto.subtle && window.crypto.webkitSubtle) {
    window.crypto.subtle = window.crypto.webkitSubtle;
}
Normally, window.crypto.subtle is a read-only property and assigning to it does nothing. That’s a security aid in case some malicious code gets into your browser and tries to replace the real API with a compromised one. But since that property doesn’t exist on current versions of Safari, the assignment works, and from that point on you can use window.crypto.subtle.
However, even with that patch, most of the examples so far in this blog still won’t work because they rely on Blobs and Blob URLs to download files, and Safari’s support of that is broken. Or maybe Safari is right and every other browser is wrong. That seems to be the subtext of this bug report. You can always modify the examples to send the files to a remote server or use data URLs instead.
Comments Off on Apple’s Safari Browser and Web Cryptography
March 1, 2015
Web Crypto on my AndroidWear Watch
I just tried out some of the live web crypto demos that I’ve blogged about on my Moto 360 AndroidWear watch. Most of them read files which doesn’t seem to work on a watch (go figure). But the one that creates and stores key pairs works fine! It’s a pretty terrible user experience given that the page isn’t even well designed for a phone, much less a watch, but it works.
Wow. Public key cryptography in a web browser on a wristwatch. This API is a game changer.
Comments Off on Web Crypto on my AndroidWear Watch
February 14, 2015
Deriving Keys from Passwords with WebCrypto
It has been quite a while since my last post. I got painted into a corner trying to import key pairs that were from the Windows 7 certificate store using the Web Cryptography API. The problem is that the exported keys are encrypted with an algorithm that converts a user-supplied (and required) password to a key using triple DES. But WebCrypto doesn’t support triple DES. So that ended that, and then the holidays and the new year took my attention away. But I’m ready to move forward again. And this post will cover something similar to what blocked my Windows 7 key importation attempts: how to derive keys from passwords,but for use with WebCrypto supported algorithms.
By the way, the Web Cryptography API has become a Candidate Recommendation since my last post. This and future posts will use the API as specified in that version. The changes from the earlier draft are mostly fixed typos and improved consistency.
Password-based Key Derivation
The goal today is to derive 128 bit AES keys from a user-entered password. That’s a common need for simple, person-to-person secrecy. It’s not realistic for people to remember 128 bit (or longer) keys, so we need to derive those keys from normal passwords. You could, of course, just take the password’s binary encoding and add padding or truncate it to get 16 bytes (128 bits), but that would produce a very small, easily explored set of possible keys for people to try to guess. The right way is to use a key derivation function (KDF) that combines a salt unique to your application and performs multiple iterations of obscuring the result.
The Web Cryptography API supports two KDFs: HKDF-CTR and PBKDF2. They are similar to use, and since I’m more familiar with PBKDF2 that’s the one we’ll use here. Also, PBKDF2 has been around a lot longer, so it is easier to find implementations of it in a variety of programming languages that can be used to check the results.
The Sample Application
Note: The API does not mandate implementations to support any specific algorithms. Even though PBKDF2 is included in the specification, not all browsers support it. At least, not yet. This example does not work with the current version of Google Chrome, Opera, or Firefox, but does work with Chrome Canary (version 42) and Opera Developer (29). It does not work even with Firefox Nightly. And it does not with with Internet Explorer 11.
We will run this operation from the simplest possible web page:

The user will enter a password (which will display instead of being masked, to make the concepts clearer) and the derived key (in hex form) will be displayed in place of the word “Missing”. The HTML is very simple:
<!DOCTYPE html>
<!-- Copyright 2015 Info Tech, Inc. Provided under the MIT license. See LICENSE file for details. -->
<html>
<head>
    <title>Password Based Key Derivation</title>
    <script src="crypto.js"></script>
</head>

<body>
    <h1>Password Based Key Derivation</h1>

    <section id="key-management">
        <p>Password: <input type="text" size="32" id="password"/>
           <button id="derive-key">Derive Key</button>
        </p>
        <p>
            Derived Key: <span id="aes-key">Missing</span>
        </p>
    </section>
</body>
</html>
The skeleton of the JavaScript is familiar:
// Password Based Key Derivation with Web Cryptography API
//
// Copyright (c) 2015 Info Tech, Inc.
// Provided under the MIT license.
// See LICENSE file for details.

document.addEventListener("DOMContentLoaded", function() {
    "use strict";

    // Check that web crypto is even available
    if (!window.crypto || !window.crypto.subtle) {
        alert("Your browser does not support the Web Cryptography API! This page will not work.");
        return;
    }

    document.getElementById("derive-key").addEventListener("click", deriveAKey);

    // Rest of code goes here.

});
This makes sure that the browser supports the Web Cryptography API and attaches a click listener to the button. Well, it would attache a listener if the deriveAKey function existed. That function will get the password from the form, derive a key from it, and put the hex version of that key into the page. The key derivation will use the PBKDF2 algorithm. That algorithm takes a known (not secret) salt, an SHA hash function, and a count. It will hash the password with the salt, then do the same to the result of that, and repeat as many times as specified. This operation is fast enough for our purposes, but much slower than a simple hash, making it resistant to dictionary attacks.
Deriving a Key
The deriveAKey function starts out simple:
    function deriveAKey() {
        var saltString = "Pick anything you want. This isn't secret.";
        var iterations = 1000;
        var hash = "SHA-256";

        var passwordString = document.getElementById("password").value;
    }
Now that we have all the information needed by the PBKDF2 operation we can perform the operation. I expected this would just use the deriveKey method, but there seems to be a problem: even though the specification’s algorithm/operation table says you can use that method with the PBKDF2 algorithm, the PBKDF2 section of the specification does not include it. The only supported operations are generateKey, deriveBits, importKey, and Get Key Length. No deriveKey. So I figured we’d have to derive 128 bits and then import that into an AES-CBC key.
But in fact, we can use the deriveKey method. That’s because methods and operations are different things. For example, there is a deriveBits method and a deriveBits operation, and they are slightly different things. Operations are abstract procedures, while methods are actual API functions. And, while there is no deriveKey operation, there is a deriveKey method, and it relies on the deriveBits operation. Clear? No, it’s not all that clear to me, either. And from the working group’s mailing list, I see that it’s not that clear to others. But that’s the way the specification is written.
Here’s the specification of the deriveKey method:
Promise deriveKey(AlgorithmIdentifier algorithm,
                  CryptoKey baseKey,
                  AlgorithmIdentifier derivedKeyType,
                  boolean extractable,
                  sequence keyUsages );
To call this method we need the algorithm to use to derive the key (just {"name": "PBKDF2"}), a baseKey, the type of the derived key we want ({"name": "AES-CBC, "length": 128}), whether the derived key is extractable (true, so we can display the hex value on the page), and keyUsages for the derived key (["encrypt", "decrypt"]). All that’s clear, except for the baseKey parameter. And where do we enter the password? This is called a password-based key derivation function, after all.
This stumped me for quite a while. I figured the baseKey must mean the password since that’s what the basis for the derivation is. But the password is just a string, while baseKey has to be a CryptoKey. It turns out the baseKey does represent the password, but you have to convert it into a CryptoKey object in order to use it, via the importKey method. Actually, it doesn’t seem to do any conversion, just essentially coerce the value to the correct type. That method is defined by:
Promise importKey(KeyFormat format,
                  (BufferSource or JsonWebKey) keyData,
                  AlgorithmIdentifier algorithm,
                  boolean extractable,
                  sequence keyUsages );
The keyData is the password. However, it has to a BufferSource object, which means an ArrayBuffer or an ArrayBufferView (such as Uint8Array). For now, assume there is a function stringToArrayBuffer that will do that conversion. Now we can write the main code: use importKey to convert the password to a base key, use deriveKey to create a key from that base key, then use exportKey to see the key contents, which will be inserted in the aes-key span on the page. Here’s that code:
        // First, create a PBKDF2 "key" containing the password
        window.crypto.subtle.importKey(
            "raw",
            stringToArrayBuffer(password),
            {"name": "PBKDF2"},
            false,
            ["deriveKey"]).
        // Derive a key from the password
        then(function(baseKey){
            return window.crypto.subtle.deriveKey(
                {
                    "name": "PBKDF2",
                    "salt": stringToArrayBuffer(salt),
                    "iterations": iterations,
                    "hash": hash
                },
                baseKey,
                {"name": "AES-CBC", "length": 128}, // Key we want
                true,                               // Extrable
                ["encrypt", "decrypt"]              // For new key
                );
        }).
        // Export it so we can display it
        then(function(aesKey) {
            return window.crypto.subtle.exportKey("raw", aesKey);
        }).
        // Display it in hex format
        then(function(keyBytes) {
            var hexKey = arrayBufferToHexString(keyBytes);
            document.getElementById("aes-key").innerText = hexKey;
        }).
        catch(function(err) {
            alert("Key derivation failed: " + err.message);
            });
That’s it, except for the two utility conversion functions that were used.
Utility Functions
The arrayBufferToHexString function is identical to the one shown in the Symmetric Cryptography in the Browser – Conclusion post:
    function arrayBufferToHexString(arrayBuffer) {
        var byteArray = new Uint8Array(arrayBuffer);
        var hexString = "";
        var nextHexByte;

        for (var i=0; i<byteArray.byteLength; i++) {
            nextHexByte = byteArray[i].toString(16);
            if (nextHexByte.length < 2) {
                nextHexByte = "0" + nextHexByte;
            }
            hexString += nextHexByte;
        }
        return hexString;
    }
The stringToArrayBuffer function is quite a bit trickier. At first glance, it seems easy: just iterate over the characters in the string, convert each one to an integer using the charCodeAt method, and put each integer into a byte in a Uint8Array. But what happens if the string is something like “Я ♥ secrets”? The first character has code 1071 and the third has 9829. Those won’t fit into a byte. We could use a Uint16Array, though. Until someone uses a 𐎘 in their password (that is, of course, UGARITIC LETTER THANNA, with code 0x10398 = 66456, which won’t fit into 16 bits; it might not display properly in your browser unless you have very complete Unicode fonts).
Clearly, we want to put the string’s UTF-8 encoding into a Uint8Array. For example, 𐎘 will take four bytes: hex f0 90 8e 98. But how do we do that? UTF-8 encoding is extremely elegant, but not trivial to derive. Luckily, there is an encoding API that can handle that. Unfortunately, it’s quite new and not supported in all browsers yet. But then, neither is the Web Cryptography API. My cursory check seems to show that recent browsers either support both APIs or neither, so we will change the check at the start of the code to make sure both APIs are available and use the new API.
The check goes right after the web crypto check:
    if (!window.TextEncoder || !window.TextDecoder) {
        alert("Your browser does not support the Encoding API! This page will not work.");
        return;
    }
Now it’s easy to write the proper stringToArrayBuffer function:
    function stringToArrayBuffer(string) {
        var encoder = new TextEncoder("utf-8");
        return encoder.encode(string);
    }
And the application is complete.
Source and Live Demo
The source code is available on GitHub, and you can run a live version from there, too. Let’s give it a try by deriving a password from the string “My secret!”

The derived key is ed4b134e89eff7e9366af4abd5c6fb38. I gave this a sanity check by using the Python PyCrypto library to also derive a key with the same salt and password, and got the same answer. That’s good enough for me!
October 21, 2014
Web Crypto and X.509 Certificates
If you are going to use cryptography in the browser, there’s a good chance you will want to deal with X.509 certificates. This post is going to get started by using the Web Cryptography API to do two operations on certificates:
- Import a public key from an X.509 certificate
- Verify the certificate authority (CA) signature on an X.509 certificate
To keep it simple, the example used will be a root CA certificate because those are self-signed. That means we won’t need to get the public key out of one certificate (the CA’s) and use that to verify the signature on another certificate. Instead, we use the same certificate for both. But the concepts and code in this post would be the same for a non-root certificate.
Note: really validating a certificate signature generally requires validating the signatures on a chain of certificates, not just one: the certificate in question, the certificate used to sign it, the certificate used to sign that one, and so on, until you reach the self-signed root certificate. The root certificate has to be verified “out of band” because the chain has to end sometime. Again, this uses the same ideas as here, just repeated as often as needed.
The example will reference the latest current draft of the Web Cryptography API, and RFC 5280, the IETF definition of X.509 certificates. The self-signed root certificate we will use is the VeriSign Universal Root Certification Authority certificate, because VeriSign is a major CA that intends to begin using this as the basis of issued certificates and this certificate should be available on almost any PC with a web browser. Just in case it isn’t, you can get a copy directly from the CA.
Instead of creating a test web page with sample code, all the examples in this post will be made from the browser’s developer console. Google Chrome 38 was used to write it, but it should work in any browser that supports the Web Cryptography API.
Certificate Formats
If you look at the downloaded certificate in a text editor, you should see text starting with:
-----BEGIN CERTIFICATE-----
MIIEuTCCA6GgAwIBAgIQQBrEZCGzEyEDDrvkEhrFHTANBgkqhkiG9w0BAQsFADCB
and ending with:
7M2CYfE45k+XmCpajQ==
-----END CERTIFICATE-----
This is known as PEM format (for Privacy-enhanced Electronic Mail). PEM files can have one or more cryptographic objects of various types in them, delineated with BEGIN and END lines. In between the lines is a base 64 encoded version of the object in a closer-to-native format. For the CERTIFICATE type, that is a base-64 encoding of the certificate in ASN.1 DER format. The last post went into a lot of detail about this encoding, and included a JavaScript function, berToJavaScript, to convert from that binary format to a JavaScript object.
So the first step is going to be base-64 decoding the certificate into a byte array (Uint8Array) for further processing. Get the base-64 encoded part of the PEM file (the stuff between the BEGIN and END lines) into a JavaScript string encoded. It’s easier if you first put it in a text editor and concatenate it into one line. Then just do a simple variable assignment:
var encoded = "MIIEuTCCA6 (rest of string here) XmCpajQ==";Decode that string using the standard window.atob function, and then copy the bytes in the resulting binary string to a byte array:
var decoded = window.atob(encoded);
var der = new Uint8Array(decoded.length);
for (var i=0; i<decoded.length; i++) {
    der[i] = decoded.charCodeAt(i);
}
Parsing BER/DER
Next comes the hard part: parsing the encoded object. The last post has a function called berToJavaScript that takes a byte array and returns a JavaScript object describing the BER or DER encoded object at the start of the byte array. Copy and paste that function in the browser’s JavaScript console. It returns a JavaScript object with the following fields:
- cls – the ASN.1 class of the object. An object’s class controls how the tag field (below) is interpreted. Objects of class 0 (Universal class) have standard tags, others depend on the application or context. The possible values are integers 0, 1, 2, or 3.
- tag – the ASN.1 object type. The standard tags can be found in this Wikipedia article. The values are non-negative integers.
- structured – a boolean specifying whether this is a structured object or not. Structured objects’ values are themselves encoded ASN.1 objects, one after another. Other objects are called primitive, and interpreting their values depends on the tag and class.
- byteLength – the number of bytes the entire encoded object takes.
- contents – a byte array containing the object’s value.
- raw – the original byte array being parsed.
So we can parse the DER encoded object with:
var parsedCert = berToJavaScript(der);The returned value is:
{
    cls: 0,
    tag: 16,
    structured: true,
    byteLength: 1213,
    contents: Uint8Array[1209]..., // Actual values skipped here
    raw: Uint8Array[1213]...       // Again, values are skipped
}
So this is Universal class (0), which means the tag value of 16 has a standard meaning: SEQUENCE or SEQUENCE OF. It’s structured (which makes sense for a sequence). Actually parsing the certificate enough to extract the public key and verify the signature on it requires going deeper into the contents.
Parsing an X.509 Certificate
RFC 5280 defines the logical structure of the certificate. It starts with the basic certificate fields:
   Certificate  ::=  SEQUENCE  {
        tbsCertificate       TBSCertificate,
        signatureAlgorithm   AlgorithmIdentifier,
        signatureValue       BIT STRING  }
Based on our berToJavaScript result for the entire data structure, we can see we are on the right track. It had tag 16 of universal class, which matches the SEQUENCE shown here. Here’s a simple parser for a certificate:
function parseCertificate(byteArray) {
    var asn1 = berToJavaScript(byteArray);
    if (asn1.cls !== 0 || asn1.tag !== 16 || !asn1.structured) {
        throw new Error("This can't be an X.509 certificate. Wrong data type.");
    }

    var cert = {asn1: asn1};  // Include the raw parser result for debugging
    var pieces = berListToJavaScript(asn1.contents);
    if (pieces.length !== 3) {
        throw new Error("Certificate contains more than the three specified children.");
    }

    cert.tbsCertificate     = parseTBSCertificate(pieces[0]);
    cert.signatureAlgorithm = parseSignatureAlgorithm(pieces[1]);
    cert.signatureValue     = parseSignatureValue(pieces[2]);

    return cert;
}
The berListToJavaScript function reference above is pretty simple: start parsing at the beginning of the array, then at the first byte following the first result, and so on, until the byte array is consumed, returning an array containing each object:
function berListToJavaScript(byteArray) {
    var result = new Array();
    var nextPosition = 0;
    while (nextPosition < byteArray.length) {
        var nextPiece = berToJavaScript(byteArray.subarray(nextPosition));
        result.push(nextPiece);
        nextPosition += nextPiece.byteLength;
    }
    return result;
}
Now we have to write three parsers, one for each logical part. Since we’ve already converted the encoded objects to JavaScript objects, we will use them as input to the parsers. We will do that in reverse order, because that puts the simplest parsers first. The RFC says that the SignatureValue is a BIT STRING, so…
function parseSignatureValue(asn1) {
    if (asn1.cls !== 0 || asn1.tag !== 3 || asn1.structured) {
        throw new Error("Bad signature value. Not a BIT STRING.");
    }
    var sig = {asn1: asn1};   // Useful for debugging
    sig.bits = berBitStringValue(asn1.contents);
    return sig;
}
BIT STRING is a standard type that is pretty simple to parse. The contents consist of an initial byte giving the number of bits to ignore, then a byte array containing all the bits. For example, the bit string 10110 is five bits long, so any byte containing it has three more bits than the actual bit string. So this is encoded in hex as 03 b0. That means ignore the last three bits in the byte string b0 (which is 10110000 in binary).
function berBitStringValue(byteArray) {
    return {
        unusedBits: byteArray[0],
        bytes: byteArray.subarray(1)
    };
}
What about the SignatureAlgorithm? The RFC says it is an AlgorithmIdentifier, which is:
   AlgorithmIdentifier  ::=  SEQUENCE  {
        algorithm               OBJECT IDENTIFIER,
        parameters              ANY DEFINED BY algorithm OPTIONAL  }
Which leads to:
var parseSignatureAlgorithm = parseAlgorithmIdentifier;
function parseAlgorithmIdentifier(asn1) {
    if (asn1.cls !== 0 || asn1.tag !== 16 || !asn1.structured) {
        throw new Error("Bad algorithm identifier. Not a SEQUENCE.");
    }
    var alg = {asn1: asn1};
    var pieces = berListToJavaScript(asn1.contents);
    if (pieces.length > 2) {
        throw new Error("Bad algorithm identifier. Contains too many child objects.");
    }
    var encodedAlgorithm = pieces[0];
    if (encodedAlgorithm.cls !== 0 || encodedAlgorithm.tag !== 6 || encodedAlgorithm.structured) {
        throw new Error("Bad algorithm identifier. Does not begin with an OBJECT IDENTIFIER.");
    }
    alg.algorithm = berObjectIdentifierValue(encodedAlgorithm.contents);
    if (pieces.length === 2) {
        alg.parameters = {asn1: pieces[1]}; // Don't need this now, so not parsing it
    } else {
        alg.parameters = null;  // It is optional
    }
    return alg;
}
The parameters vary according to the algorithm. The RSA algorithms we will be working with don’t use parameters, so this skips really parsing them fully.
Object Identifiers (OIDs) are a standard type. Their values are essentially sequences of non-negative integers representing different kinds of objects. A common way of writing them is as a list of integers with periods between them. The first two integers are taken from the first byte: the integer division of the first byte by 40, and the remainder of that division. A common first byte is 2a (hex) which is decimal 42, giving initial two integers as 1.2.
The remaining integers are represented as lists of bytes, where all the bytes except the last ones have leading 1 bits. The leading bits are dropped and the remaining bits interpreted as a binary integer. A common hex value is 86 f7 0d. The first two bytes have leading 1 bits and the third does not, so we first convert the hex to binary (10000110 11110111 00001101), then drop the leading bits (0000110 1110111 0001101) and converting that to decimal (113549).
The list of integers is interpreted as a hierarchical tree. The first integer is the master organization for the OID, which can assign the second integer values to member organizations, and so on. For example, the OID for an RSA signature with SHA-1 (a very common one) is 1.2.840.113549.1.1.5. How do you figure these out? Similar to the way DNS lookups work. The leading 1 means this is controlled by the International Standards Organization (ISO), so look up how ISO assigns the next integer. That 2 means ISO has assigned it to a member body. The 840 is the United States, which assigned 113549 to RSA Data Security, Inc. (RSADSI). RSA created the various standards we are using, they assigned 1 to their PKCS family of specifications, which assigned 1 to the PKCS-1 specification, which assigned 5 to the algorithm RSA encryption with SHA-1 hashing.
Or you can just Google 1.2.840.113549.1.1.5 to find a helpful web site that interprets these for you. Based on what we’ve already seen in the API, we will only be supporting that option and 1.2.840.113549.1.1.11 (RSA with SHA-256) for now.
Here’s the code for getting OBJECT IDENTIFIERs:
function berObjectIdentifierValue(byteArray) {
    var oid = Math.floor(byteArray[0] / 40) + "." + byteArray[0] % 40;
    var position = 1;
    while(position < byteArray.length) {
        var nextInteger = 0;
        while (byteArray[position] >= 0x80) {
            nextInteger = nextInteger * 0x80 + (byteArray[position] & 0x7f);
            position += 1;
        }
        nextInteger = nextInteger * 0x80 + byteArray[position];
        position += 1;
        oid += "." + nextInteger;
    }
    return oid;
}
Now for the biggest piece, the TBSCertificate. The RFC gives the definition:
   TBSCertificate  ::=  SEQUENCE  {
        version         [0]  EXPLICIT Version DEFAULT v1,
        serialNumber         CertificateSerialNumber,
        signature            AlgorithmIdentifier,
        issuer               Name,
        validity             Validity,
        subject              Name,
        subjectPublicKeyInfo SubjectPublicKeyInfo,
        issuerUniqueID  [1]  IMPLICIT UniqueIdentifier OPTIONAL,
        subjectUniqueID [2]  IMPLICIT UniqueIdentifier OPTIONAL,
        extensions      [3]  EXPLICIT Extensions OPTIONAL
        }
We can continue down the path as before, defining parsers for each piece, but right now we only care about the subjectPublicKeyInfo (because we want to import that into a CryptoKey object to verify a signature) and signature (which is actually the algorithm used for the signature, which we need to know to verify a signature). So we won’t extend the parsing of any of the other pieces here:
function parseTBSCertificate(asn1) {
    if (asn1.cls !== 0 || asn1.tag !== 16 || !asn1.structured) {
        throw new Error("This can't be a TBSCertificate. Wrong data type.");
    }
    var tbs = {asn1: asn1};  // Include the raw parser result for debugging
    var pieces = berListToJavaScript(asn1.contents);
    if (pieces.length < 7) {
        throw new Error("Bad TBS Certificate. There are fewer than the seven required children.");
    }
    tbs.version = pieces[0];
    tbs.serialNumber = pieces[1];
    tbs.signature = parseAlgorithmIdentifier(pieces[2]);
    tbs.issuer = pieces[3];
    tbs.validity = pieces[4];
    tbs.subject = pieces[5];
    tbs.subjectPublicKeyInfo = parseSubjectPublicKeyInfo(pieces[6]);
    return tbs;  // Ignore optional fields for now
}
We’re almost there. Parsing the SubjectPublicKeyInfo is easy with what’s already been written. The RFC says its structure is:
   SubjectPublicKeyInfo  ::=  SEQUENCE  {
        algorithm            AlgorithmIdentifier,
        subjectPublicKey     BIT STRING  }
So the parser is just:
function parseSubjectPublicKeyInfo(asn1) {
    if (asn1.cls !== 0 || asn1.tag !== 16 || !asn1.structured) {
        throw new Error("Bad SPKI. Not a SEQUENCE.");
    }
    var spki = {asn1: asn1};
    var pieces = berListToJavaScript(asn1.contents);
    if (pieces.length !== 2) {
        throw new Error("Bad SubjectPublicKeyInfo. Wrong number of child objects.");
    }
    spki.algorithm = parseAlgorithmIdentifier(pieces[0]);
    spki.bits = berBitStringValue(pieces[1].contents);
    return spki;
}
Okay, the parser is putting in enough pieces to do the cryptography we want. We parse the certificate with:
var certificate = parseCertificate(der);If all the code above is right, and was correctly pasted into the console, this should return an object representing the certificate.
Cryptography
The first thing we need to do is get the public key into a CryptoKey object. After all this build-up, it turns out to be quite easy.
var publicKey;

var alg = certificate.tbsCertificate.signature.algorithm;
if (alg !== "1.2.840.113549.1.1.5" && alg !== "1.2.840.113549.1.1.11") {
   throw new Error("Signature algorithm " + alg + " is not supported yet.");
}

var hashName = "SHA-1";
if (alg === "1.2.840.113549.1.1.11") {
    hashName = "SHA-256";
}

window.crypto.subtle.importKey(
    'spki',
    certificate.tbsCertificate.subjectPublicKeyInfo.asn1.raw,
    {name: "RSASSA-PKCS1-v1_5", hash: {name: hashName}},
    true,
    ["verify"]
).
then(function(key) {
    publicKey = key;
}).
catch(function(err) {
    alert("Import failed: " + err.message);
});
Run this in the JavaScript console and then examine publicKey. It should show as a CryptoKey.
Verifying the signature is just as easy:
window.crypto.subtle.verify(
    {name: "RSASSA-PKCS1-v1_5", hash: {name: hashName}},
    publicKey,
    certificate.signatureValue.bits.bytes,
    certificate.tbsCertificate.asn1.raw
).
then(function(verified) {
    if (verified) {
        alert("The certificate is properly self-signed.");
    } else {
        alert("The self-signed certificate's signature is not valid.");
    }
}).
catch(function(err) {
    alert("Error verifying signature: " + err.message);
});
And that is that.
October 17, 2014
Parsing BER and DER encoded ASN.1 Objects
[Updated October 21, 2014: Fixed error about how an indefinite length is encoded. It is not encoded as 0x00. It is encoded as 0x80. Text and code have been corrected.]
The question that likely comes to mind is, “Why?” What do BER, DER, and ASN.1 have to do with web crypto?
Some of the most dominant implementations of public key cryptography, along with important parts of the Web Cryptography API, use BER and DER encoded ASN.1 objects to serialize and deserialize keys, documents, and other important data structures. So parsing this format is a step along the way to handling those cryptographic objects. This post will create a JavaScript parser for these objects. It’s only a means to an end, and you don’t need to know all the gory details here in order to use the parser in upcoming posts. So feel free to skip this and wait for the next article about working with X.509 certificates.
Overview
ASN.1 is Abstract Syntax Notation 1, a method for describing data objects. It was created in the 1980s, is a binary format, and as the name says, it is abstract. To actually store or transfer an ASN.1 object, it must be encoded in a standard way. Distinguished Encoding Rules (DER) is the encoding used for X.509, and is an unambiguous subset of Basic Encoding Rules (BER). Those rules are specified in ITU standard X.690, but I recommend reading the Wikipedia article instead of the specification, at least first.
Since DER is a subset of BER, any valid DER encoded object is also a valid BER one, so we only need to know BER to handle both encodings. To interpret a BER encoded object, you go byte by byte, figuring out the characteristics of the object as you go:
- The object will be in one of four classes: 0, 1, 2, or 3. 0 is the Universal Class, which defines a standard set of tags for objects. Other classes define other meanings of the tags, which can be application or context specific.
- Every object has a tag that describes the kind of object it is. Tags are non-negative integers, and there’s no upper limit on how big they can be. Universal class tags include 1 (BOOLEAN), 2 (INTEGER), and so on.
- Objects can be structured, meaning their value includes other BER encoded objects, or primitive. Marking this may seem redundant since the tag type implies structure or not, but that’s only true for universal class tags that have globally agreed meaning.
- The contents of the object is a series of bytes. In most cases, the length of that sequence is explicitly specified preceding the content.
Parsing an Object
Here are the rules for getting the BER encoded information out of the byte array:
- The first two bits of the first byte are the object’s class.
- The third bit of the first byte tells whether it is primitive (0) or structured (1).
- The remaining 5 bits of the first byte are the object’s tag, unless they are all 1. In that case, the next one or more bytes give the tag value. Take each byte until you encounter one with a leading 0 bit instead of a leading 1 bit. Drop the first bit from each byte, and concatenate the remaining bits. Interpret that result as an integer. (Don’t worry, examples will follow.)
- The next byte starts defining the length of the contents. If it is
0x80, the length is unknown, and the contents immediately follow, trailed by two 0 bytes in a row. If the value of the first byte is between 0 and 128 (exclusive) then that value is the length. Otherwise, the value is 128 more than the number of bytes containing the length, which is interpreted as a big-endian integer. (Again, examples will follow.) - The remaining length bytes are the contents if the length is non-zero. Otherwise the length is unknown until you reach two zero bytes in a row. The contents in that case are everything up to, but not including, those two zero bytes.
Examples
Knowing the rules is good, but examples help a lot. Here are four that cover the major variations.Each one is shown in hex.
04 05 12 34 56 78 90
The first byte is 00000100 in binary. The first two bits are 00, so the class is 0 (Universal). The third bit is 0, so this is primitive. The last five bits are 00100. They’re not all 1, so they are the value of the tag: 4 in decimal form. The length is described starting in the second byte 05. That’s between 0 and 128, so that’s the length of the contents, and the contents are the next 5 bytes: 12 34 56 78 90.
30 82 02 10 04 01 56 … (for many more bytes)
The first byte is 00110000 in binary. The first two bits are 00 so the class is again 0. The third bit is 1, so it is structured. The last five bits are 10000, so the tag is 16 decimal. The next byte is 82 hex, which is 130 decimal, which is 128 + 2, the the following 2 bytes give the length. They are 02 10, which is interpreted in “big-endian” format as 2*256 + 16 = 528. The next 528 bytes, starting with 04 01 56, contain the contents.
df 82 02 05 12 34 56 78 90
The first byte is 11011111 in binary. The first two bits are 11, so this is class 3 – Private. The next bit is a 0, so this is primitive. The remaining five bits are all 1, so the actual tag starts in the second byte. The second byte has a leading one, and the third byte does not, so the tag is constructed by taking those two bytes (10000010 00000010 in binary), dropping their leading bits to get the fourteen bits 00000100000010, and interpreting this as a binary number. Thus, the tag is 258 decimal. The next byte is 05, which is less than 128, so that is the actual length of the contents. The next 5 bytes (12 34 56 78 90) are the contents.
30 80 04 03 56 78 90 00 00
The first byte, 30, is one we’ve seen before. It is universal class, structured, with tag 16. The next byte is 80, so the length is unknown at first. The contents are all the following bytes, up to (but not including) the first two sequential zero bytes. So the contents are 04 03 56 78 90, and we can figure out from the contents that the length is 5.
Those examples pretty much cover everything, so we can start on code.
berToJavaScript
This function will take a BER (or DER) encoded byte array (Uint8Array) and return a JavaScript object with fields cls (for class, which is a reserved word, an integer value), tag (integer), structured (boolean), and contents (Uint8Array). There won’t be a length field because the contents object automatically has a length property. But there will be a byteLength field, which tells how many bytes long the entire object it. It will also have a field called raw, which is the BER/DER encoded source data, included for ease of debugging.
Note: this code is absolutely not production ready! Given bad data it may try to overrun the byteArray it is given, causing an exception. Even good data may cause a problem if it includes numbers too big for JavaScript to represent exactly as a Number. A lot more data checking as it goes will need to be added to make this robust. The point here is just to get something good enough to explore things like X.509 certificates, and perhaps be a starting point for production code.
The code keeps track of the position of the next byte to examine, and extracts the fields sequentially. It’s pretty straightforward:
function berToJavaScript(byteArray) {
    "use strict";
    var result = {};
    var position = 0;

    result.cls              = getClass();
    result.structured       = getStructured();
    result.tag              = getTag();
    var length              = getLength(); // As encoded, which may be special value 0

    if (length === 0x80) {
        length = 0;
        while (byteArray[position + length] !== 0 || byteArray[position + length + 1] !== 0) {
            length += 1;
        }
        result.byteLength   = position + length + 2;
        result.contents     = byteArray.subarray(position, position + length);
    } else {
        result.byteLength   = position + length;
        result.contents     = byteArray.subarray(position, result.byteLength);
    }

    result.raw              = byteArray.subarray(0, result.byteLength); // May not be the whole input array
    return result;

    // Define the "get" functions here
}
The zero length byte possibility really adds some ugliness here, and cannot happen for DER encoded objects, so you can leave it out if that is all you need.
Each get function is pretty straightforward. These functions have to be nested inside berToJavaScript because they use the shared varables byteArray and position.
    function getClass() {
        var cls = (byteArray[position] & 0xc0) / 64;
        // Consumes no bytes
        return cls;
    }
Dividing by 64 is the same as shifting right six bits.
    function getStructured() {
        var structured = ((byteArray[0] & 0x20) === 0x20);
        // Consumes no bytes
        return structured;
    }
Getting the tag is trickier:
    function getTag() {
        var tag = byteArray[0] & 0x1f;
        position += 1;
        if (tag === 0x1f) {
            tag = 0;
            while (byteArray[position] >= 0x80) {
                tag = tag * 128 + byteArray[position] - 0x80;
                position += 1;
            }
            tag = tag * 128 + byteArray[position] - 0x80;
            position += 1;
        }
        return tag;
    }
Getting the length is similar to, but not exactly the same, as getting the tag:
    function getLength() {
        var length = 0;

        if (byteArray[position] < 0x80) {
            length = byteArray[position];
            position += 1;
        } else {
            var numberOfDigits = byteArray[position] & 0x7f;
            position += 1;
            length = 0;
            for (var i=0; i<numberOfDigits; i++) {
                length = length * 256 + byteArray[position];
                position += 1;
            }
        }
        return length;
    }
Checking It Out
With the get functions inserted inside berToJavaScript it should be possible to check the function out with the examples above, using a browser’s JavaScript console. Paste the assembled code (found at the bottom of this post) into the console to define the function, then create and try to parse each byte array:
var test1 = new Uint8Array([0x04, 0x05, 0x12, 0x34, 0x56, 0x78, 0x90]);
berToJavaScript(test1);
That yields the right result:
{cls: 0, structured: false, tag: 4, byteLength: 7, contents: Uint8Array[5]…}The second test object needs to be a much longer byte array: 532 bytes at least (528 byte contents plus four bytes before the contents). So we create a bit byte array initialized to all zero, then fill in the first several bytes:
var test2 = new Uint8Array(532);
test2.set([0x30, 0x82, 0x02, 0x10, 0x04, 0x01, 0x56]); // Fill in the first several bytes, leave rest 0
berToJavaScript(test2);
Result is {cls: 0, structured: true, tag: 16, byteLength: 532, contents: Uint8Array[528]…}.
How about a big tag number?
var test3 = new Uint8Array([0xdf, 0x82, 0x02, 0x05, 0x12, 0x34, 0x56, 0x78, 0x90]);
berToJavaScript(test3);
Gives {cls: 3, structured: false, tag: 130, byteLength: 9, contents: Uint8Array[5]…}.
The last test has an indeterminate length:
var test4 = new Uint8Array([0x30, 0x00, 0x04, 0x03, 0x56, 0x78, 0x90, 0x00, 0x00]);
berToJavaScript(test4);
Yields {cls: 0, structured: true, tag: 16, byteLength: 9, contents: Uint8Array[5]…}.
These are hardly exhaustive tests, but give confidence that the parser should be good enough for further exploration. That’s going to happen in the next post, which will extract a public key from an X.509 certificate and verify the signature on a certificate.
Assembled Function
If you want to try this out yourself, here’s the code from above put together for ease of cutting and pasting:
function berToJavaScript(byteArray) {
    "use strict";
    var result = {};
    var position = 0;

    result.cls              = getClass();
    result.structured       = getStructured();
    result.tag              = getTag();
    var length              = getLength(); // As encoded, which may be special value 0

    if (length === 0x80) {
        length = 0;
        while (byteArray[position + length] !== 0 || byteArray[position + length + 1] !== 0) {
            length += 1;
        }
        result.byteLength   = position + length + 2;
        result.contents     = byteArray.subarray(position, position + length);
    } else {
        result.byteLength   = position + length;
        result.contents     = byteArray.subarray(position, result.byteLength);
    }

    result.raw              = byteArray.subarray(0, result.byteLength); // May not be the whole input array
    return result;

    function getClass() {
        var cls = (byteArray[position] & 0xc0) / 64;
        // Consumes no bytes
        return cls;
    }

    function getStructured() {
        var structured = ((byteArray[0] & 0x20) === 0x20);
        // Consumes no bytes
        return structured;
    }

    function getTag() {
        var tag = byteArray[0] & 0x1f;
        position += 1;
        if (tag === 0x1f) {
            tag = 0;
            while (byteArray[position] >= 0x80) {
                tag = tag * 128 + byteArray[position] - 0x80;
                position += 1;
            }
            tag = tag * 128 + byteArray[position] - 0x80;
            position += 1;
        }
        return tag;
    }

    function getLength() {
        var length = 0;

        if (byteArray[position] < 0x80) {
            length = byteArray[position];
            position += 1;
        } else {
            var numberOfDigits = byteArray[position] & 0x7f;
            position += 1;
            length = 0;
            for (var i=0; i<numberOfDigits; i++) {
                length = length * 256 + byteArray[position];
                position += 1;
            }
        }
        return length;
    }
}September 19, 2014
Saving Cryptographic Keys in the Browser
Prior posts here have used the Web Cryptography API to encrypt and decrypt files, and to sign and verify them. But those examples have no practical use because the keys being used are stored in JavaScript variables and disappear as soon as they go out of scope. This post will take the first step toward solving that problem, creating a persistent key store within the browser so that key pairs can be used over multiple sessions and on multiple pages. This is still not any kind of production code, though; it’s an illustration of some of the problems any code you write will have to solve.
The sample code is available on Github, and a live demonstration is also available. But before jumping into coding, consider the risks of storing private keys in the browser. A web browser is a challenging security environment by its very nature, but when proper care is taken it is usually a reasonable choice for an application platform. However, private cryptographic keys are very sensitive. In many uses a private key is a proxy for a user’s actual identity. If they are going to be managed within a web browser, the greatest possible care should be taken with them. In particular, there should be additional safeguards to prevent rogue code (or even just erroneous code) from sending private keys to anyone.
The Web Cryptography API can provide those safeguards by keeping private keys opaque. That is, the API lets applications create and use keys without ever being able to see their actual values. If code inside the browser can’t see the values, it can’t disclose them. All cryptographic keys are stored as type CryptoKey which do not provide access to their values, which are stored outside the browser environment. It is up to the browser vendor to make that storage as secure as possible; in any case, it is inaccessible from inside the browser.
There are cases where code inside the browser might need to access the actual value of key. For example, the public key encryption example created an AES-CBC key and then needed to make it visible so it could be encrypted with RSA-OAEP. That was possible because the AES-CBC key was created with its extractable property set to true. To keep stored keys secure, set their extractable property to false when they are created or imported.
Aside: the API always allows public keys to be exported, regardless of how they are created or imported. That’s because public keys are not sensitive information. They are intended to be shared.
Because CryptoKey objects are opaque they can’t be placed in localStorage, which only supports simple types. Instead the key store will use IndexedDB, which can clone and store opaque variables. IndexedDB is more complex than localStorage, so dealing with it will be take up much of this post.
The Sample Web Page
The page demonstrates key storage by letting the user create signing or encrypting key pairs and storing them persistently. A list of the stored key pairs is always displayed, along with a link to download the public key portion of the saved key pair. There’s very little to the page itself:
<!DOCTYPE html>
<!-- Copyright 2014 Info Tech, Inc. Provided under the MIT license. See LICENSE file for details. -->
<html>
<head>
    <title>Key Management</title>
    <script src="keystore.js"></script>
    <script src="keymanagement.js"></script>
</head>
<body>
    <h1>Key Management</h1>
    <section id="create-keys">
        <h1>Create New Key Pair</h1>
        Key Name: <input type="text" id="created-key-name"/><br/>
        Purpose:
            <input type="radio" name="created-key-type" value="Signing">Signing</input>
            <input type="radio" name="created-key-type" value="Encrypting">Encrypting</input>
            <br/>
        <button id="create-key">Create Key Pair</button>
    </section>
    <section id="list-keys">
        <h1>Stored Keys</h1>
        <ul id="key-list">
        </ul>
    </section>
</body>
</html>
Key storage is provided by a KeyStore object whose code is in keystore.js. The page itself is managed using code in keymanagement.js. The key storage code will be deferred for now. All we need to know to use it is how to create a KeyStore object and use the methods it provides:
- Create the object with
new KeyStore(). - All object methods return Promises because almost all IndexedDB operations are asynchronous.
- Open and close the key store with the
openandclosemethods. - Save a key pair with the
saveKeymethod, providing the public key, the private key (or null if not known), and a user-supplied name to identify it. - Fetch a key pair with the
getKeymethod, providing either the database supplied id, the assigned name, or the exported public key in spki format. - Get a list of all key pairs with the
listKeysmethod.
The overall structure of the page’s JavaScript is very similar to all the previous examples:
// Copyright 2014 Info Tech, Inc.
// Provided under the MIT license.
document.addEventListener("DOMContentLoaded", function() {
    "use strict";
    if (!window.crypto || !window.crypto.subtle) {
        alert("Your current browser does not support the Web Cryptography API! This page will not work.");
        return;
    }
    if (!window.indexedDB) {
        alert("Your current browser does not support IndexedDB. This page will not work.");
        return;
    }
    // All the work happens here.
}
The only new thing here is the check for window.indexedDB to be defined, along with the previously shown check for window.crypto.subtle.
The body of the code needs to create and open a key store, set a click handler on the only button on the page, and add a list of all stored keys to the page:
    var keyStore = new KeyStore();
    keyStore.open().
    then(function() {
        document.getElementById("create-key").addEventListener("click", handleCreateKeyPairClick);
        populateKeyListing(keyStore);
    }).
    catch(function(err) {
        alert("Could not open key store: " + err.message)
    });
Note that the keyStore object is never closed. An IndexedDB database will close automatically when the variable goes out of scope. The close method is provided only so the developer can force it to close earlier if desired.
The populateKeyListing function uses the new key storage listKeys method. The Promise it returns passes an array of objects to the resolver. Each object has an id property and the value of the actual stored key. The value is an object with publicKey, privateKey, name, and spki properties. (The name of the standard export format for public keys is spki (for Subject Public Key Info), which is why that property has an odd name.)
    function populateKeyListing(keyStore) {
        keyStore.listKeys().
        then(function(list) {
            for (var i=0; i<list.length; i++) {
                addToKeyList(list[i].value);
            }
        }).
        catch(function(err) {
            alert("Could not list keys: " + err.message);
        });
    }

    function addToKeyList(savedObject) {
        var dataUrl = createDataUrlFromByteArray(new Uint8Array(savedObject.spki));
        var name = escapeHTML(savedObject.name);
        document.getElementById("list-keys").insertAdjacentHTML(
            'beforeEnd',
            '<li><a download="' + name + '.publicKey" href="' + dataUrl + '">' + name + '</a></li>');
    }
The addToKeyList function adds a single key to the list of keys and makes each one a link that can be used to download the public key in spki format. To do that job, it relies on two utility functions: createDataUrlFromByteArray and escapeHTML:
function escapeHTML(s) {
return s.toString().replace(/&/g, "&").replace(/</g, "<").replace(/>/g, ">").replace(/"/g, """).replace(/'/g, "'");
}
function createDataUrlFromByteArray(byteArray) {
var binaryString = '';
for (var i=0; i<byteArray.byteLength; i++) {
binaryString += String.fromCharCode(byteArray[i]);
}
return "data:application/octet-stream;base64," + btoa(binaryString);
}Prior examples provided download links by creating a URL for a Blob. Exported public keys are relatively short, so the simpler dataURI link is used here instead.
The button click handler is the only code left to write for the page. It needs to check that a name is provided and determine whether the user selected a signing key or an encrypting key. Those two kinds of keys use different algorithms and have different usages, so the correct values are saved in variables. Then it creates the key pair, saves it in the key store, and adds it to the displayed list of keys:
    function handleCreateKeyPairClick() {
        var algorithmName, usages;

        var name = document.getElementById("created-key-name").value;
        if (!name) {
            alert("Must specify a name for the new key.");
            return;
        }

        var selection = document.getElementsByName("created-key-type");
        if (selection[0].checked) { // Signing key
            algorithmName = "RSASSA-PKCS1-v1_5";
            usages = ["sign", "verify"];
        } else if (selection[1].checked) { // Encrypting key
            algorithmName = "RSA-OAEP";
            usages = ["encrypt", "decrypt"];
        } else {
            alert("Must select kind of key first.");
            return;
        }

        window.crypto.subtle.generateKey(
            {
                name: algorithmName,
                modulusLength: 2048,
                publicExponent: new Uint8Array([1, 0, 1]),  // 24 bit representation of 65537
                hash: {name: "SHA-256"}
            },
            false,  // Cannot extract new key
            usages
        ).
        then(function(keyPair) {
            return keyStore.saveKey(keyPair.publicKey, keyPair.privateKey, name);
        }).
        then(addToKeyList).
        catch(function(err) {
            alert("Could not create and save new key pair: " + err.message);
        });
    }
Note that the code relies on the key store’s saveKey method passing an object representing the saved key to its resolver.
Key Store Definition
The key store will be an object, created by calling the KeyStore constructor.
function KeyStore() {
    "use strict";
    var self = this;
    self.db = null;  // Filled in when the open method succeeds
    self.dbName = "KeyStore";      // Arbitrarily selected
    self.objectStoreName = "keys"; // Arbitrarily selected

    // Method definitions go here
}
The dbName and objectStoreName properties are the persistent names of the IndexedDB database and the IndexedDB object store that will hold the keys. A database contains one or more object stores and each object store is a collection of data objects; in this case, those objects include the CryptoKey objects we want to store. In theory the user could provide the database and object store names to the constructor, but at this stage there seems to be little benefit from doing that so they are hard-coded.
That object’s open method will create or connect to the IndexedDB database holding the keys. If the open operation succeeds the key store’s db property will be updated. There’s no need for any value to be passed on, but since it might be handy in the future the key store object itself is passed to the Promise’s resolver.
    self.open = function() {
        return new Promise(function(fulfill, reject) {
            // code to come, including "fulfill(self)" at some point
        });
    };
Opening an IndexedDB database a bit tricky: you have to create a new request to open the database and have callbacks to handle four cases: opens successfully, fails to open at all, is blocked from opening (because it’s already opened elsewhere), or is being created or upgraded in response to your request. The actual database open also needs to provide a version number. The structure of the database can only be changed when that version number changes. This code sets the version number to 1 so if there’s an existing database with that version it just opens it, otherwise it opens it and then executes the handler for an upgrade.
    var req = indexedDB.open(self.dbName, 1);
    req.onsuccess = function(evt) {
        // Work with the database in evt.target.result
    };
    req.onfailure = function(evt) {
        // Deal with the error in evt.error
    };
    req.onblocked = function(evt) {
        // Create an Error describing the problem.
    };
    req.onupgradeneeded = function(evt) {
        // "Upgrade" or initialize the database in evt.target.result
    };
The easiest handlers are for the two error conditions:
    req.onerror = function(evt) {
        reject(evt.error);
    };
    req.onblocked = function(evt) {
        reject(new Error("Database already open."));
    };
Success is easy to handle, too. The event includes the opened database, so the handler needs to save that in the object for future use and then call the Promise’s resolver:
    req.onsuccess = function(evt) {
        self.db = evt.target.result;
        fulfill(self);
    };
The longest handler is for onupgradeneeded. If this is the first time the database is opened the code needs to create an object store to actually hold the keys. Since it’s possible for this event to occur on an existing database that may or may not have the necessary object store already defined, the code checks for it first:
    req.onupgradeneeded = function(evt) {
        self.db = evt.target.result;
        if (!self.db.objectStoreNames.contains(self.objectStoreName)) {
            var objectStore = self.db.createObjectStore(self.objectStoreName, {autoIncrement: true});
            objectStore.createIndex("name", "name", {unique: false});
            objectStore.createIndex("spki", "spki", {unique: false});
        }
    };
The object store and two indexes are created if the store does not already exist. Every object store needs to have a unique primary key that IndexedDB can use to identify each record. Since we are so often dealing with cryptographic keys the primary key is called the id in this code. The call to createObjectStore tells IndexedDB to create that id itself by auto-incrementing an integer. Each call to createIndex takes three parameters: the name of the index to create, the name of the object property to use for the index, and an optional object that in this case specifies that the indexed properties do not have to be be unique. It is common to use the same name for the index and the indexed property, as shown here.
The simplest method is close:
    self.close = function() {
        return new Promise(function(fulfill, reject){
            self.db.close();
            self.db = null;
            fulfill();
        });
    };
The IndexedDB close() operation returns immediately, returning nothing. But this method returns a Promise for consistency with all the other methods.
The saveKey method creates and stores an object with four properties: publicKey, privateKey (which is allowed to be null), name, and spki. Three of those four properties are passed to it as arguments. The spki property value is created by exporting the public key:
    self.saveKey = function(publicKey, privateKey, name) {
        return new Promise(function(fulfill, reject) {
            if (!self.db) {  // No operation can be performed.
                reject(new Error("KeyStore is not open."));
            }

            window.crypto.subtle.exportKey('spki', publicKey).
            then(function(spki) {
                var savedObject = {
                    publicKey:  publicKey,
                    privateKey: privateKey,
                    name:       name,
                    spki:       spki
                };

                var transaction = self.db.transaction([self.objectStoreName], "readwrite");
                transaction.onerror = function(evt) {reject(evt.error);};
                transaction.onabort = function(evt) {reject(evt.error);};
                transaction.oncomplete = function(evt) {fulfill(savedObject);};

                var objectStore = transaction.objectStore(self.objectStoreName);
                var request = objectStore.add(savedObject);
            }).
            catch(function(err) {
                reject(err);
            });
        });
    }
After the public key has been exported this code first creates the savedObject, which will be put into the database. Operations that access information in the database are performed as parts of a transaction. Each transaction operates on one or more object stores so they must be created with an array of the names of affected object stores, and the creation operation has to specify whether the transaction should be allowed to write to the database (readwrite) or not (readonly). Event handlers on the transaction object deal with errors, aborts, or successful completion of the transaction. Note that each of these handlers calls the Promise’s fulfill or reject method. When that happens the transaction goes out of scope and is automatically closed. Actually saving the object is simple. The code gets the object store from the transaction and calls its add method.
The getKey function is logically simpler but a bit longer because the caller might want to look it up by id, name, or spki. In each case, the actual database fetch will be done with a get method. If the property to be searched is the id (which is the primary key for the database) then this is a method on the object store itself. If it’s a property that’s indexed (name or spki) then the get is a method on the index itself. The get method is asynchronous, and needs handlers for success and failure:
    self.getKey = function(propertyName, propertyValue) {
        return new Promise(function(fulfill, reject) {
            if (!self.db) { // No operation can be performed.
                reject(new Error("KeyStore is not open."));
            }

            var transaction = self.db.transaction([self.objectStoreName], "readonly");
            var objectStore = transaction.objectStore(self.objectStoreName);
            var request;
            if (propertyName === "id") {
                request = objectStore.get(propertyValue);
            } else if (propertyName === "name") {
                request = objectStore.index("name").get(propertyValue);
            } else if (propertyName === "spki") {
                request = objectStore.index("spki").get(propertyValue);
            } else {
                reject(new Error("No such property: " + propertyName));
            }

            request.onsuccess = function(evt) {
                fulfill(evt.target.result);
            };
            request.onerror = function(evt) {
                reject(evt.error);
            };
        });
    };
That leaves one more method: listKeys. This method introduces the use of a cursor. This is similar to a request, but after it provides a single value to the onsuccess handler the event result’s continue method can be invoked to start fetching the next one. A success with a null value for the result indicates that the entire list has been traversed. This would make it easy to create an iterator for the list of keys, but this method will keep it simple by building an array of keys and returning the whole thing when ready:
    self.listKeys = function() {
        return new Promise(function(fulfill, reject) {
            if (!self.db) {
                reject(new Error("KeyStore is not open."));
            }

            var list = [];

            var transaction = self.db.transaction([self.objectStoreName], "readonly");
            transaction.onerror = function(evt) {reject(evt.error);};
            transaction.onabort = function(evt) {reject(evt.error);};

            var objectStore = transaction.objectStore(self.objectStoreName);
            var cursor = objectStore.openCursor();

            cursor.onsuccess = function(evt) {
                if (evt.target.result) {
                    list.push({id: evt.target.result.key, value: evt.target.result.value});
                    evt.target.result.continue();
                } else {
                    fulfill(list);
                }
            }
        });
    };
This completes the key storage functionality, at least for now. These basic operations can provide a lot of utility.
Issues
This example provides a way for a user to get a copy of a public key and take it elsewhere, but no way to import such a public key when that occurs. If that capability existed it would be possible to use extended versions of the sample applications shown so far to encrypt messages to other users (with their public keys) and verify digitally signed files (again, with a public key). So the ability to import a public key would be useful.
A bigger problem is that the browser is allowed to delete this key storage database whenever it wants to, such as needing more space. That’s not likely to happen but it would be prudent to have a way to back up entire key pairs when they are first created and restore them later. That would also allow users to keep their keys in more than one browser. Backing up the private key would require it to be marked as extractable, which we do not want to do. The solution is a bit of a hack: create the key pair as extractable, export the private key and have the user download it, create a new private key by importing that data and marking the imported private key as not extractable. Then, after all that, store the non-extractable private key in the key store.
Finally, there are other programs out there that use public key pairs and it would be nice to interoperate with them to the extent possible. The next post will make a small start toward that by importing a public key from an X.509 certificate.
Comments Off on Saving Cryptographic Keys in the Browser
August 29, 2014
Changes to the Web Cryptography API
Chrome 37 made it to Stable a few days ago, and now supports the Web Cryptography API without needing to set a special flag. YAY!
But it dropped support for the RSAES-PKCS1-v1_5 algorithm so now the example from the public-key cryptography in the browser post last week doesn’t work any more. BOO!
What happened was that, as part of making the API generally available in Chrome, they updated their code to match the latest editor’s draft of the specification. Which drops RSAES-PKCS1-v1_5. I’m trying to understand why by looking at the change logs and mailing lists, but it seems that there is a vulnerability in that algorithm in certain use cases, so the working group felt it shouldn’t be included. The only public-key encryption and decryption algorithm in the spec now is RSA-OAEP. So I need to rework the example to use that algorithm instead. Which is a very simple set of changes except for one thing: my installation of Chrome (on Ubuntu 14.04) doesn’t support it. The error message when I tried to generate a key said that I needed a newer version of NSS (Network Security Services) to use it.
I tried using apt-get to install a newer version, but I already has the newest version available in the standard repositories. A bit of searching around led me to a discussion on how to watch Netflix on Linux, which included how to get the newest versions of the necessary NSS packages:
- Browse to http://us.archive.ubuntu.com/ubuntu/pool/main/n/nss/ to see all available packages.
- Find the newest versions (libnss3_3.16.3-1ubuntu1_amd64.deb, libnss3-nssdb_3.16.3-1ubuntu1_all.deb, and libnss3-1d_3.16.3-1ubuntu1_amd64.deb for my 64-bit version of Ubuntu)
- Download those .deb packages.
- Install them with
sudo dpkg -i libnss3*.deb
Then restart Chrome (you may need to kill all the hidden Chrome processes with pkill chrome for a full restart).
Now my installation of Chrome 37 supports RSA-OAEP, so I can fix the earlier samples. Watch this blog for an announcement when it’s done.
[Update August 31, 2014: Included all three required packages, instead of just the main one.]
August 26, 2014
Digital Signatures in the Browser
Digital signatures are kind of a mirror image of public-key encryption. They use essentially the same algorithms and kinds of key pairs, but for authentication instead of secrecy. Alice can send Bob a document that Bob can be certain was created by Alice, and not changed by anyone else, by signing the document with her privateKey. Bob can verify the signature using her publicKey. It’s the reverse of how you use keys for secrecy.
Because digital signatures are closely related to public-key encryption, the Web Cryptography API offers methods to create and use them. This post will build an example web page and related JavaScript to digitally sign a selected file, and then verify (or reject verification of) a signed file. The structure of the page and code are very similar to the encryption sample build in the last post on using the Web Cryptography API. The sample code is available on Github, and a live demonstration is also available.
About Digital Signatures
People have been signing documents for as long as there has been writing. And people having been forging signatures probably nearly as long. Forging an ink signature on paper requires skill, and there are various ways to analyze the signature to indicate whether it was forged or not. But when we start dealing with digital documents, the problem gets harder. It may be legal to “sign” a digital document, perhaps by appending your name to it, but how do we deal with avoiding forgeries? Or even with people repudiating completely valid documents by claiming they are forgeries? After all, anybody can change the bits in a file and there’s no way to know whether that happened.
Digital signatures apply public-key cryptography to make forgeries, or repudiation by claiming forgery, essentially impossible. Recall that anything signed one of a key pair’s keys can be decrypted only by the other member of the same key pair. Encryption used this for secret messages: Alice can send Bob a message that only Bob can read by encrypting it with Bob’s public key, which everybody knows. But only Bob has the matching private key, so only Bob can read the message. But what if Alice encrypted the message with her private key instead? Then anybody could read the message, because everybody knows her public key. But only Alice could have created the encrypted file, because only Alice has the matching private key. If Alice provides a message in both original and encrypted forms, where the encryption used her private key, she cannot credibly repudiate it because nobody but Alice could have created the encrypted version. You could even say that the encrypted version is a signature of the original message.
Digital signatures work almost like this, but with an optimization. Instead of encrypting the entire message to provide a signature, a message is digitally signed by creating a message digest and then encrypting it with the creator’s private key. A message digest is just a hashed value of the original message, so that any change to the message would change the hashed value, and there’s no effective way to create a second message with the same hashed value. Recipients decrypt the encrypted message digest with the purported signer’s public key, and also compute their own message digest on the original message, and compare the two. If they match, the signature is verified. If not, it is considered invalid.
The Web Page
The demonstration web page is almost exactly the same as the one for public-key encryption and decryption, except that it references a different JavaScript file and labels the buttons sign and verify instead of encrypt and decrypt:
<!DOCTYPE html>
<html>
<head>
    <title>Digital Signature</title>
    <script src="digitalsign.js"></script>
</head>
<body>
    <h1>Digital Signature</h1>
    <section id="sign-and-verify">
        <input type="file" id="source-file"/>
        <button id="sign">Sign File</button>
        <button id="verify">Verify Signature</button>
    </section>
    <section id="results">
        Download results:
        <ul id="download-links">
        </ul>
    </section>
</body>
</html>
The basic structure of the JavaScript file is also quite similar to the encryption and decryption example:
document.addEventListener("DOMContentLoaded", function() {
    "use strict";

    if (!window.crypto || !window.crypto.subtle) {
        alert("Your current browser does not support the Web Cryptography API! This page will not work.");
        return;
    }

    var keyPair;
    createAndSaveAKeyPair().
    then(function() {
        document.getElementById("sign").addEventListener("click", signTheFile);
        document.getElementById("verify").addEventListener("click", verifyTheFile);
    }).
    catch(function(err) {
        alert("Could not create a keyPair or enable buttons: " + err.message + "\n" + err.stack);
    });
});
The only difference in this high-level JavaScript is the IDs of the buttons and the names of the click handlers being attached.
Creating a Key Pair
There are only three differences between creating a key pair for encryption and creating one for signing:
- The name of the algorithm to use must be one that supports signing and verifying.
- Keys used for digital signing must have an additional parameter stating which hash function to use for message digests.
- The usages array must include sign and verify instead of encrypt and decrypt.
The public-key encryption sample application used the RSAES-PKCS1-v1_5 algorithm, but the table of registered algorithms shows that can only be used for encryption and decryption. The closely related algorithm RSASSA-PKCS1-v1_5 supports signing and verifying, and is already implemented in Chrome and Firefox, so that’s the one we use. As for the hash function to use, any of the SHA-2 family should be fine, such as SHA-256.
With those minor changes, the code is:
function createAndSaveAKeyPair() {
    return window.crypto.subtle.generateKey(
        {
            name: "RSASSA-PKCS1-v1_5",
            modulusLength: 2048,
            publicExponent: new Uint8Array([1, 0, 1]),  // 24 bit representation of 65537
            hash: {name: "SHA-256"}
        },
        true,   // can extract it later if we want
        ["sign", "verify"]).
    then(function (key) {
        keyPair = key;
        return key;
    });
}
Signing
Once again, the high level structure is the same as before, except for performing a sign operation instead of an encrypt one:
function signTheFile() {
    var sourceFile = document.getElementById("source-file").files[0];
    var reader = new FileReader();
    reader.onload = processTheFile;
    reader.readAsArrayBuffer(sourceFile);

    function processTheFile() {
        var reader = this;              // Was invoked by the reader object
        var plaintext = reader.result;

        sign(plaintext, keyPair.privateKey).
        then(function(blob) {
            var url = URL.createObjectURL(blob);
            document.getElementById("download-links").insertAdjacentHTML(
                'beforeEnd',
                '<li><a href="' + url + '">Signed file</a></li>');
        }).
        catch(function(err) {
            alert("Something went wrong signing: " + err.message + "\n" + err.stack);
        });
    }
}
The sign function, though, is much simpler than the encrypt one was. That’s because the API’s sign function handles creating the message digest for us, instead of our having to perform several additional steps as was needed to create a session key. There’s only one API method needed: window.crypto.subtle.sign. That yields the digital signature to the returned Promise’s then method, which needs to put the signature and original plaintext together into one file. The simple packaging used here is just:
2-byte-integer-signature-length:signature-length-byte-signature:plaintextThe needed code is:
function sign(plaintext, privateKey) {
    return window.crypto.subtle.sign(
        {name: "RSASSA-PKCS1-v1_5"},
        privateKey,
        plaintext).
    then(packageResults);

    function packageResults(signature) {
        var length = new Uint16Array([signature.byteLength]);
        return new Blob(
            [
                length,     // Always a 2 byte unsigned integer
                signature,  // "length" bytes long
                plaintext   // Remainder is the original plaintext
            ],
            {type: "application/octet-stream"}
        );
    }
}
Verifying
To verify a signature we need to extract the signature and plaintext from the combined package, then check that the signature is valid for that plaintext and public key. The new piece here is informing the user of whether the signature is valid or not, done with the alert function. A download link will only be provided if the signature checks out:
function verifyTheFile() {
    var sourceFile = document.getElementById("source-file").files[0];
    var reader = new FileReader();
    reader.onload = processTheFile;
    reader.readAsArrayBuffer(sourceFile);

    function processTheFile() {
        var reader = this;              // Invoked by the reader object
        var data = reader.result;
        var signatureLength = new Uint16Array(data, 0, 2)[0];   // First 16 bit integer
        var signature       = new Uint8Array( data, 2, signatureLength);
        var plaintext       = new Uint8Array( data, 2 + signatureLength);

        verify(plaintext, signature, keyPair.publicKey).
        then(function(blob) {
            if (blob === null) {
                alert("Invalid signature!");
            } else {
                alert("Signature is valid.");
                var url = URL.createObjectURL(blob);
                document.getElementById("download-links").insertAdjacentHTML(
                    'beforeEnd',
                    '<li><a href="' + url + '">Verified file</a></li>');
            }
        }).
        catch(function(err) {
            alert("Something went wrong verifying: " + err.message + "\n" + err.stack);
        });
    }
}
The verify function yields a Blob containing the plaintext if the signature is verified, and null otherwise. Again, only one API function is needed, because the API handles the message digest operation automatically:
function verify(plaintext, signature, publicKey) {
    return window.crypto.subtle.verify(
        {name: "RSASSA-PKCS1-v1_5"},
        publicKey,
        signature,
        plaintext
    ).
    then(handleVerification);

    function handleVerification(successful) {
        if (successful) {
            return new Blob([plaintext], {type: "application/octet-stream"});
        } else {
            return null;
        }
    }
}
Summing Up
This post is quite a bit shorter than the example of public-key encryption and decryption. That’s partly because there was less exposition needed now, and partly because signing and verifying with the API are quite a bit simpler. As before, this illustrates how to use the API, but has no practical use because there is no key persistence, export, or import performed. I hope to address those things in a future post.
August 23, 2014
Public Key Cryptography in the Browser
Update August 30, 2014: The Web Cryptography API has dropped support of the RSAES-PKCS1-v1_5 algorithm that was used here originally, so this post has been changed to use RSA-OAEP instead. There’s a new post with more information, including how to update Ubuntu 14.04 so that this algorithm will work in browsers.
It’s been a month since I published posts on how to perform symmetric cryptography in web browsers using the Web Cryptography API. Now we’ll move on to performing asymmetric, or public-key, cryptography in the browser. The goal of this post is to write the simplest possible in-browser code to encrypt and decrypt files using public-key cryptography. The result will not be a useful tool at all, but should be a good first step toward a useful tool.
Even though this is just about the simplest possible example, this is still a very long post! Sorry about that, but it will be clearer this way than spread out over several posts. The final example is available on Github, and a live demonstration page is available, too.
The API
The Web Cryptography API is available through the window.crypto object in the browser. Most of the functionality is in the window.crypto.subtle object. It is still under development but already widely available. Chrome browsers currently turn it off unless the flag Enable Experimental Web Platform Features is set, but Google has announced that it will be on by default starting with Chrome 37, due out in a few weeks. Firefox Nightly builds have it, and it’s expected to move to the Aurora releases on September 2, then step by step to beta and general release. The Opera Developer release now supports it, but doesn’t seem to support public-key algorithms yet and I don’t when it will be complete and move to stable. I haven’t been able to find any information on if and when Safari will support it. Internet Explorer 11 general release supports a prefixed version at window.msCrypto. Unfortunately, that’s based on an earlier version of the API. The functionality is there, but the behavior of the methods is a bit different from what we will use here.
Those are all desktop browsers, but mobile versions of them seem to be working to implement this API, too. They are lagging a bit behind the desktops, but making progress.
Any of the browser versions supporting window.crypto.subtle should eventually be able to run the code in this post. It was developed with Chrome 36 and the web platform flag enabled, and tested in in Firefox Nightly. As of this writing, it does not yet work in Opera Developer.
JavaScript Promises
Promise objects offer a way to perform asynchronous operations without using callbacks. They can’t do anything more than callbacks can, but they can be more convenient to use, especially when you have to chain aynchronous operations together. The API returns a Promise for almost every operation.
A Promise has two important methods: then and catch. They each take a function as a parameter, and each return another Promise. If the operation of the Promise succeeds, the function provided to the then method is executed and passed the result of the operation as its sole parameter. If it fails or has an exception, the function provided to the catch method is run and usually provided with an Error object as its sole parameter.
The result of the then or catch method is another promise, which provides its return value as the parameter to that new Promise’s then handler (or Error object to the catch handler). Finally, instead of separate then and catch methods, you can just pass two functions to the then handler which will execute the first one on success, or the second one on failure.
The code in this post often chains Promises together to force asynchronous operations to happen sequentially. Once you get comfortable with them, you’ll likely find this pretty clear to follow.
About Public-Key Cryptography
Symmetric cryptography, as used in the earlier blog posts, uses a single secret key to encrypt and decrypt data. Which means that any two parties (call them Alice and Bob) that want to communicate securely have to first find a secure way to share that key. And if three or more parties want to communicate securely they either have to accept that everyone in the group can read everything, or create and share separate keys for every pair of people in the group. And a secret shared by a group isn’t likely to remain secret. As Ben Franklin said, three can keep a secret if two of them are dead.
Public key cryptography solves these problems, though it adds complexity to do so. It can be hard to get your head around it, which isn’t surprising considering that symmetric cryptography has been around for millennia but public key cryptography wasn’t invented until the 1970s. The core idea is that each party owns a pair of keys, called the public and private keys, that are related in such a way that anything encrypted with one of those keys can only be decrypted with the other one. The difference between the keys in a key pair is just that one is arbitrarily called public and shared with anyone at all, while the other one is called private and kept under the sole control of the key pair owner.
So even if Alice and Bob have never met or had a secure way to communicate before, they can use public key cryptography to securely share information. Alice can send Bob a secret message by encrypting it with Bob’s public key, and then only Bob can decrypt it because he has sole control of his private key. And if you have a large group, each member would have a separate key pair and anyone could communicate securely with any other specific member using that member’s public key.
It’s important to remember that this provides secure communication with the owner of a key pair, who may or may not be the actual person you think it is. Reliably authenticating the owner of a key pair is a separate problem that public key cryptography can help with, but it isn’t addressed in this post.
The Web Page
The page is just going to allow the user to select a file and then click a button to encrypt or decrypt it. Those operations will use a key pair that is randomly generated when the page is created. That’s right. Once the page is closed, there’s no way to decrypt anything it encrypted because the key pair is gone for good. Persisting, exporting, and importing keys are left out of this example.
The HTML is really simple:
<!DOCTYPE html>
<html>
<head>
    <title>Public-Key Encryption</title>
    <script src="pkcrypto.js"></script>
</head>
<body>
    <h1>Public-Key Encryption</h1>
    <section id="encrypt-and-decrypt">
        <input type="file" id="source-file"/>
        <button id="encrypt">Encrypt File</button>
        <button id="decrypt">Decrypt File</button>
    </section>
    <section id="results">
        Download results:
        <ul id="download-links">
        </ul>
    </section>
</body>
</html>
The skeleton of the JavaScript is a lot like the symmetric cryptography code. The main difference is that the user doesn’t control the key pair; it’s automatically created when the page loads:
document.addEventListener("DOMContentLoaded", function() {
    "use strict";

    if (!window.crypto || !window.crypto.subtle) {
        alert("Your current browser does not support the Web Cryptography API! This page will not work.");
        return;
    }

    var keyPair;
    createAndSaveAKeyPair().
    then(function() {
        // Only enable the cryptographic operation buttons if a key pair can be created
        document.getElementById("encrypt").addEventListener("click", encryptTheFile);
        document.getElementById("decrypt").addEventListener("click", decryptTheFile);
    }).
    catch(function(err) {
        alert("Could not create a keyPair or enable buttons: " + err.message);
    });

    // More code to come
}
The createAndSaveAKeyPair function puts its result in the keyPair variable instead of returning it because it runs asynchronously. It returns before it has created the pair. However, the following then clause does not run until the keyPair has been successfully created and saved.
Creating a Key Pair
We used the API’s generateKey method to create a key for symmetric cryptography in the earlier posts, though any bit sequence of the right length would have worked. With public key cryptography you must use a sophisticated algorithm to create a key pair, because the keys must have necessary mathematical properties that anything encrypted with one key can only be decrypted with the other. It is also important that it must not be feasible to derive one member of the key pair from the other. The generateKey method can do all that. It’s the same method signature as before:
window.crypto.subtle.generateKey(algorithmIdentifier, extractableFlag, keyUsagesList).
then(successHandler).
catch(failureHandler);
So the first step in creating a key pair is to figure out the algorithm that will use it and the parameters to provide for it. The draft has a table of registered algorithms listed with their possible usages. Right now there are only two is only one public key algorithms listed that can be used to encrypt and decrypt: RSAES-PKCS1-v1_5 and RSA-OAEP, both specified in RFC 3447. Both use It uses the RSA algorithm as their its basis.
The algorithmIdentifier object has to include the name of the algorithm and the RsaHashedKeyGenParams modulusLength, publicExponent, and hash. The modulusLength is generally known as the key length, and has to be much larger than an AES key of similar security. The most common choice at this time is 2048 bits for the modulusLength, considered secure enough but not too large to work with easily. The publicExponent is a different story, and picking a good choice requires a pretty deep understanding of the RSA algorithm. But good news: Chrome currently only supports the values 3 and 65537 (2^16 + 1) for this, so we don’t have to think much about it. We’ll use 65537 (0x101). Finally, hash has to identify a supported hash function for the algorithm, so we will use SHA-256.
The following code returns a Promise that generates one key pair and saves it in the variable keyPair. You can just call the function and expect that the value of keyPair will eventually be updated, or you can use the then clause of the returned Promise to run code that should only occur after the value has been updated. Since the function provided to the then method returns the keyPair, that value will be provided as the input parameter to the next then clause in a chain.
function createAndSaveAKeyPair() {
    return window.crypto.subtle.generateKey(
        {
            name: "RSA-OAEP",
            modulusLength: 2048,
            publicExponent: new Uint8Array([1, 0, 1]),  // 24 bit representation of 65537
            hash: {name: "SHA-256"}
        },
        true,   // can extract it later if we want
        ["encrypt", "decrypt"]).
    then(function(key) {
        keyPair = key;
        return key;
    });
}
If this works, keyPair will be an object with fields of type Key named privateKey and publicKey. We’re going to encrypt a file with the publicKey, and then later decrypt it with the matching privateKey.
Encryption
This should be easy. The earlier series of posts encrypted and decrypted a file, so this should be pretty much the same, right? Unfortunately, wrong. The RSA algorithm can only encrypt data somewhat smaller than the key’s modulusLength, which is only 2048 bits (256 bytes). That’s pretty limiting. And even if it could encrypt more data, we wouldn’t want to do it. RSA is extremely slow. Really, really, slow.
So how can you share a file secretly using public key cryptography? By creating a random symmetric key (say, a 128 bit AES key) and encrypting the file with that key. Then encrypt that key (known as the session key) using public key cryptography with the public key. Give the recipient the encrypted file and the encrypted session key so they can first decrypt the session key with their private key, then decrypt the file with that session key.
Having to use a session key adds more work, but it has a benefit. You can encrypt a file to multiple recipients by using a single session key, and then separately encrypt the session key to each recipient. The resulting secret message is much smaller than it would be if you had to encrypt the actual message with multiple keys.
So the steps we need to follow are:
- Create a random session key.
- Encrypt the plaintext (original file) with the session key.
- Export the session key.
- Encrypt the session key with the recipient’s public key.
- Package the encrypted session key and encrypted file together for delivery.
These steps don’t have to be done strictly in sequence. For instance, step 2 could be done in parallel with steps 3 and 4. Since all the steps are done with Promises, that’s possible, but to keep this example as simple as possible we’ll just do the steps in order. Here’s the skeleton of the needed code:
function encrypt(plaintext, publicKey) {
    // Returns a Promise that provides its then handler
    // a Blob representing the encrypted data.
    var sessionKey, encryptedFile; // Used in two steps, so saved here for passing

    return window.crypto.subtle.generateKey(
        {name: "AES-CBC", length: 128},
        true,
        ["encrypt", "decrypt"]).
    then(saveSessionKey).     // Need this in a later (not just the next) step
    then(encryptPlaintext).
    then(saveEncryptedFile).  // Need this result in a later step
    then(exportSessionKey).
    then(encryptSessionKey).
    then(packageResults);
}
Note the lack of a catch method. Since this returns a promise, it can defer handling errors to a catch method on the return value or even a later step in a chain. The relatively global variables sessionKey and encryptedFile are holders for intermediate values needed in later (not just immediately following) steps:
- saveSessionKey saves the session key in the variable sessionKey, and also passes it to the next step.
- encryptPlaintext takes the session key as a parameter and encrypts plaintext with that session key and a random initialization vector, passing the resulting iv and ciphertext in an array to the next step.
- saveEncryptedFile gets an array of the iv and ciphertext as a parameter, and saves them in the variable encryptedFile. It doesn’t return anything.
- exportSessionKey ignores the parameters it is given, and exports the saved sessionKey to an ArrayBuffer, passing the result to the next step.
- encryptSessionKey will get the exported session key as a parameter, and encrypt it with publicKey, passing the encrypted key result to the next step.
- packageResults will use the encrypted session key it is passed as a parameter and the saved encryptedFile to produce a Blob holding all the encrypted data, and pass the Blob to the next step (the then method handler of the Promise being returned).
Now that it’s broken down into parts, it isn’t too complicated to build. encryptPlaintext and exportSessionKey are each essentially operations that were shown in earlier posts:
function encryptPlaintext(sessionKey) {
    // The plaintext is in an enclosing scope, called plaintext
    var iv = window.crypto.getRandomValues(new Uint8Array(16));
    return window.crypto.subtle.encrypt({name: "AES-CBC", iv: iv}, sessionKey, plaintext).
    then(function(ciphertext) {
        return [iv, new Uint8Array(ciphertext)];
    });
}

function exportSessionKey() {
    // Exports the sessionKey from the enclosing scope.
    return window.crypto.subtle.exportKey('raw', sessionKey);
}
The functions to save intermediate values in enclosing scopes are both pretty trivial:
function saveSessionKey(key) {
    sessionKey = key;
    return key;
}

function saveEncryptedFile(ivAndCiphertext) {
    encryptedFile = ivAndCiphertext;
}
Which brings us to the two meaty new parts, one dealing with crypto, one wrangling and packaging multiple pieces of data into a Blob. Encrypting the session key turns out to be pretty easy:
function encryptSessionKey(exportedKey) {
    // Encrypts the exportedKey with the publicKey found in the enclosing scope.
    return window.crypto.subtle.encrypt({name: "RSA-OAEP"}, publicKey, exportedKey);
}
Now for the nasty part: packaging this up to provide to the recipient, who will eventually decrypt it all. At a minimum, the package has to contain the encrypted session key, iv, and ciphertext. But it should also have a lot more in it:
- The symmetric algorithm that was used to create the ciphertext.
- The public key algorithm used to create the encrypted session key.
- Some kind of identifier of the public key the session key was encrypted for, so that recipients can know which private key they need to decrypt it.
- A way to indicate which bytes of the file represent the different pieces of the package.
There are two widely used message formats that address all these issues and more: OpenPGP and Cryptographic Message Syntax (CMS). They’re both pretty complex, so this post won’t cover them. After all, the key pair being used is stored only as a JavaScript variable, so it’s going to go away as soon as the browser is closed and any encrypted messages built with this page will then be forever inaccessible. So keep it as simple as possible: the package format will contain the encrypted session key followed immediately by the iv and ciphertext. Since it’s not clear that the encrypted session key will always be the same size, it will be preceded by a 16 bit integer giving its length:
2-byte-key-length:key-length-byte-encrypted-session-key:16-byte-iv:ciphertext
We end up with the following:
function packageResults(encryptedKey) {
    var length = new Uint16Array([encryptedKey.byteLength]);
    return new Blob(
        [
            length,             // Always a 2 byte unsigned integer
            encryptedKey,       // "length" bytes long
            encryptedFile[0],   // 16 bytes long initialization vector
            encryptedFile[1]    // Remainder is the ciphertext
        ],
        {type: "application/octet-stream"}
    );
}
Note that we get the 16 bit length by creating a one element array of unsigned 16 bit integers.
Creating and Saving the Encrypted Results
The symmetric encryption example in the previous posts got their input file from an element in the page with the id source-file, and put a link to the result at the end of an unordered list with id download-links. The page containing all this code follows the same pattern.
function encryptTheFile() {
    var sourceFile = document.getElementById("source-file").files[0];

    var reader = new FileReader();
    reader.onload = processTheFile;
    reader.readAsArrayBuffer(sourceFile);

    function processTheFile() {
        var reader = this;  // Was invoked by the reader object
        var plaintext = reader.result;
        encrypt(plaintext, keyPair.publicKey). // keyPair defined in enclosing scope
        then(function(blob) {
            var url = URL.createObjectURL(blob);
            document.getElementById("download-links").insertAdjacentHTML(
                'beforeEnd',
                '<li><a href="' + blobUrl + '">Encrypted file</a></li>');
        }).
        catch(function(err) {
            alert("Something went wrong encrypting: " + err.message + "\n" + err.stack);
        });
    }
}
Decryption
Decryption is similar to encryption, though actually a bit easier. Encryption was described more or less bottom-up; decryption will be described top-down. The click handler is identical, except that the processTheFile step is different:
function decryptTheFile() {
    var sourceFile = document.getElementById("source-file").files[0];

    var reader = new FileReader();
    reader.onload = processTheFile;
    reader.readAsArrayBuffer(sourceFile);

    function processTheFile() {
        var reader = this;              // Invoked by the reader object
        var data = reader.result;

        var keyLength       = new Uint16Array(data, 0, 2)[0];   // First 16 bit integer
        var encryptedKey    = new Uint8Array( data, 2,              keyLength);
        var iv              = new Uint8Array( data, 2 + keyLength,  16);
        var ciphertext      = new Uint8Array( data, 2 + keyLength + 16);

        decrypt(ciphertext, iv, encryptedKey, keyPair.privateKey).
        then(function(blob) {
            var url = URL.createObjectURL(blob);
            document.getElementById("download-links").insertAdjacentHTML(
                'beforeEnd',
                '<li><a href="' + url + '">Decrypted file</a></li>');
        }).
        catch(function(err) {
            alert("Something went wrong decrypting: " + err.message + "\n" + err.stack);
        });
    }
}
The first part of processing is to pull out the four parts of the file: the keyLength, needed only to then get the right number of bytes for the encryptedKey, then the initialization vector, and finally the ciphertext itself. These are all passed to the decrypt function, which returns a promise that yields a Blob to the then method handler. That handler creates a URL for the blob and puts it in the page.
The actual decryption takes only three steps:
function decrypt(ciphertext, iv, encryptedSessionKey, privateKey) {
    return decryptKey(encryptedSessionKey, privateKey).
    then(importSessionKey).
    then(decryptCiphertext);
}
And the three steps are themselves pretty simple, given all the background covered so far:
function decryptKey(encryptedKey, privateKey) {
    return window.crypto.subtle.decrypt({name: "RSA-OAEP"}, privateKey, encryptedKey);
}

function importSessionKey(keyBytes) {
    return window.crypto.subtle.importKey(
        "raw",
        keyBytes,
        {name: "AES-CBC", length: 128},
        true,
        ["encrypt", "decrypt"]
    );
}

function decryptCiphertext(sessionKey) {
    return window.crypto.subtle.decrypt({name: "AES-CBC", iv: iv}, sessionKey, ciphertext).
    then(function(plaintext) {
        return new Blob([new Uint8Array(plaintext)], {type: "application/octet-stream"});
    });
}
Summing Up
This was a long post, but it’s as concise as possible. It illustrates how to use public-key cryptography to encrypt and decrypt files with the Web Cryptography API. And it is of no practical use. The key pair used goes away as soon as the page is closed, lost forever. And even if that problem were solved, this page could not interoperate with any other software. More code is needed to import and export key pairs in standard formats used by other systems, and build an encrypted file in a standard format. I hope to deal with those challenges in a future post.
The next post in this series, though, will continue to be completely useless as a practical matter. It will demonstrate digitally signing files and then verifying those digital signatures.
July 16, 2014
Symmetric Cryptography in the Browser – Conclusion
This series of posts is almost complete. We’ve created, imported, and exported AES keys and used them to encrypt and decrypt files, all inside a standard web browser using the new Web Cryptography API. All that’s left is to put it all together into a single web page. That’s what we’ll do now.
The page and code discussed in here are available on Github, and as a live page you can immediately try out.
I’m going to put together the simplest page I can think of. The top part will cover generating, importing, and exporting keys. The middle part will allow selection of a file on your computer and buttons to encrypt or decrypt that file, and the bottom part will have links to the results of the operations you’ve already done. Here’s a picture of the page:

As of now, this page works in the current version of Google Chrome, provided you turn on the “Enable Experimental Web Platform Features” flag, and in the current Firefox nightly build. It doesn’t work in Internet Explorer 11 because that implements an older version of the API and uses a vendor prefix for it. However, it should be fairly straightforward to modify this to work there.
Let’s take a look at the HTML:
<!DOCTYPE html>
<html>
<head>
    <title>Symmetric Encryption</title>
    <script src="crypto.js"></script>
</head>
<body>
    <h1>Symmetric Encryption</h1>
    <section id="key-management">
        <input type="text" size="32" id="aes-key"/>
        <button id="generate-key">Generate Random AES Key</button>
    </section>
    <section id="encrypt-and-decrypt">
        <input type="file" id="source-file"/>
        <button id="encrypt">Encrypt File</button>
        <button id="decrypt">Decrypt File</button>
    </section>
    <section id="results">
        Download results:
        <ul id="download-links">
        </ul>
    </section>
</body>
</html>
It’s pretty simple. The head loads the JavaScript that does all the work. The key-management section allows you to enter a hex encoded key, or click a button to generate a random one. The encrypt-and-decrypt section is where you select a file to operate on and click a button to perform the operation, and the results section contains a list of links to download the results of each operation.
The JavaScript is where all the work happens. We don’t want to set up any click handlers until the page is ready, so the content of crypto.js is all wrapped in a function that runs when the page is ready:
document.addEventListener("DOMContentLoaded", function() {
    "use strict";
    if (!window.crypto || !window.crypto.subtle) {
        alert("Your current browser does not support the Web Cryptography API! This page will not work.");
        return;
    }
    // rest of code goes here
});
If the browser doesn’t support web.crypto.subtle this shows the user a message and does nothing else. Otherwise, it continues by attaching listeners to each button:
    document.getElementById("generate-key").addEventListener("click", generateAKey);
    document.getElementById("encrypt").addEventListener("click", encryptTheFile);
    document.getElementById("decrypt").addEventListener("click", decryptTheFile);
And all the work happens in the three listeners. First, the one that generates a new key on demand:
    function generateAKey() {
        window.crypto.subtle.generateKey(
            {name: "AES-CBC", length: 128}, // Algorithm using this key
            true,                           // Allow it to be exported
            ["encrypt", "decrypt"]          // Can use for these purposes
        ).
        then(function(aesKey) {
            window.crypto.subtle.exportKey('raw', aesKey).
            then(function(aesKeyBuffer) {
                document.getElementById("aes-key").value = arrayBufferToHexString(aesKeyBuffer);
            }).
            catch(function(err) {
                alert("Key export failed: " + err.message);
            });
        }).
        catch(function(err) {
            alert("Key generation failed: " + err.message);
        });
    }
We’ve seen code like this in the previous posts. The only new thing here is that once a key is generated it’s exported, converted to a hex string, and that string placed in the input box for use by future operations. Each operation uses the value in that input box instead of a saved key object so that the user can put new keys in at any time. Exporting the key and later importing it to use it is inefficient, but not a big deal.
Actually encrypting the file is quite a bit longer:
    function encryptTheFile() {
        var sourceFile = document.getElementById("source-file").files[0];
        var aesKeyBytes = hexStringToByteArray(document.getElementById("aes-key").value);
        var aesKey; // To be created below
        var reader = new FileReader();
        reader.onload = function() {
            var iv = window.crypto.getRandomValues(new Uint8Array(16));
            window.crypto.subtle.encrypt(
                {name: "AES-CBC", iv: iv},
                aesKey,
                new Uint8Array(reader.result)
            ).
            then(function(result) {
                var blob = new Blob([iv, new Uint8Array(result)], {type: "application/octet-stream"});
                var blobUrl = URL.createObjectURL(blob);
                document.getElementById("download-links").insertAdjacentHTML(
                    'beforeEnd',
                    '<li><a href="' + blobUrl + '" download="' + sourceFile.name + '.encrypted">Encryption of ' + sourceFile.name + '</a></li>'
                    );
            }).
            catch(function(err) {
                alert("Encryption failed: " + err.message);
            });
        };

        window.crypto.subtle.importKey(
            "raw",
            aesKeyBytes,
            {name: "AES-CBC", length: 128},
            true,
            ["encrypt", "decrypt"]
        ).
        then(function(importedKey) {
            aesKey = importedKey;
            reader.readAsArrayBuffer(sourceFile);
        }).
        catch(function(err) {
            alert("Key import and file read failed: " + err.message);
        });
    }
Let’s take this code a step at a time. First we create the variables that will be used in each further step: the sourceFile (from the file selector input box), the aesKey (that will be imported from the aesKeyBytes pulled out of the input box in the page), and the FileReader object reader.
Next we tell what should happen when the file has been read in. That’s identical to what we did in the last post except for inserting a list element in the web page with a link to the blobUrl we create. The steps are: create a random initialization vector iv, encrypt the data that was read in with the aesKey and the iv, then create a blob with the iv followed by the encrypted data and build a URL for that blob. The only problem here is that we haven’t seen any value assigned to aesKey yet.
We need to import the bytes for the AES key into aesKey, and that’s the last step in the code, though it runs before the file has been read. Once the imported key is ready, we kick off the FileReader reader. When it’s done, the handler described in the last paragraph takes over and finishes the job. The use of a callback when reading a file means that the steps are defined out of the order they will actually run. If the FileReader object was a Promise, it might be clearer.
The decryption code is much like the code above, except it pulls the iv out of the beginning of the encrypted file instead of creating a new random one. Again, this was covered in more detail in the last post:
    function decryptTheFile() {
        var sourceFile = document.getElementById("source-file").files[0];
        var aesKeyBytes = hexStringToByteArray(document.getElementById("aes-key").value);
        var aesKey; // To be created below
        var reader = new FileReader();
        reader.onload = function() {
            var iv = new Uint8Array(reader.result.slice(0, 16));
            window.crypto.subtle.decrypt(
                {name: "AES-CBC", iv: iv},
                aesKey,
                new Uint8Array(reader.result.slice(16))
            ).
            then(function(result) {
                var blob = new Blob([new Uint8Array(result)], {type: "application/octet-stream"});
                var blobUrl = URL.createObjectURL(blob);
                document.getElementById("download-links").insertAdjacentHTML(
                    'beforeEnd',
                    '<li><a href="' + blobUrl + '" download="' + sourceFile.name + '.decrypted">Decryption of ' + sourceFile.name + '</a></li>'
                    );
            }).
            catch(function(err) {
                alert("Decryption failed: " + err.message);
            });
        };

        window.crypto.subtle.importKey(
            "raw",
            aesKeyBytes,
            {name: "AES-CBC", length: 128},
            true,
            ["encrypt", "decrypt"]
        ).
        then(function(importedKey) {
            aesKey = importedKey;
            reader.readAsArrayBuffer(sourceFile);
        }).
        catch(function(err) {
            alert("Key import and file read failed: " + err.message);
        });
    }
There’s nothing here that wasn’t seen just above or in the prior blog post.
All that’s left are a couple of utility functions to convert between hex encoded strings and arrays of bytes. We saw them two posts ago, but here they are again for completeness:
    function arrayBufferToHexString(arrayBuffer) {
        var byteArray = new Uint8Array(arrayBuffer);
        var hexString = "";
        var nextHexByte;
        for (var i=0; i<byteArray.byteLength; i++) {
            nextHexByte = byteArray[i].toString(16);  // Integer to base 16
            if (nextHexByte.length < 2) {
                nextHexByte = "0" + nextHexByte;     // Otherwise 10 becomes just a instead of 0a
            }
            hexString += nextHexByte;
        }
        return hexString;
    }

    function hexStringToByteArray(hexString) {
        if (hexString.length % 2 !== 0) {
            throw Error("Must have an even number of hex digits to convert to bytes");
        }
        var numBytes = hexString.length / 2;
        var byteArray = new Uint8Array(numBytes);
        for (var i=0; i<numBytes; i++) {
            byteArray[i] = parseInt(hexString.substr(i*2, 2), 16);
        }
        return byteArray;
    }
The entire example is available on GitHub. I hope you find it a useful starting point for using this new API. It worked well for me, encrypting or decrypting a 100MB file in about a second.
Of course, speed doesn’t help if it’s wrong, so I used OpenSSL to check the results. It was kind of a pain because OpenSSL wants the IV as a command line parameter and only the rest of the encrypted payload as its input. But I did managed to do that and it worked. Here are the steps.
My original file is called original, the key from the web page is 9ad96448523485f6f2936c9259eca6e3, and the encrypted version from the web page is called original.encrypted. Here’s the file listing:
-rw-r--r-- 1 charles domain users 105235836 Jul 14 15:13 original
-rw-r--r-- 1 charles domain users 105235856 Jul 14 15:32 original.encrypted
Note that the encrypted file is 20 bytes longer than the original one. That’s due to adding a 16 byte initialization vector, and padding it to be a multiple of 16 bytes long. To use OpenSSL I need to separate the IV from the rest of the ciphertext first, using the intuitive command:
head -c 16 original.encrypted | od -t x1
That x1 instead of just x (for hex) is vital! I left it off at first and got the bytes scrambled because it processed 16-bit words instead of separate bytes. This shows the IV in hex as:
0000000 99 3f 00 6e 1c 30 64 72 5c 7b 35 fe 96 a9 44 25
The IV is just the actual digits starting with 99, with the spaces removed. Now we need to get the raw ciphertext (with the IV stripped from the start):
tail -c 105235840 original.encrypted > raw_ciphertext
That magic number 105235840 is just the size of original.encrypted less 16 bytes for the leading IV. Finally we can use OpenSSL. I’ve stretched out over two lines for a bit more clarity:
openssl enc -aes-128-cbc -d -K 9ad96448523485f6f2936c9259eca6e3 \

-iv 993f006e1c3064725c7b35fe96a94425 -in raw_ciphertext -out plaintext
The resulting plaintext is identical to original, checked with cmp original plaintext.
This ends the series of posts on Symmetric Encryption in the browser. Next time I’ll start looking at using public key cryptography with this API. The basic operations don’t look too hard, but compatibility with existing standard file structures may be really tough. We’ll see.
July 13, 2014
Symmetric Cryptography in the Browser – Part 3
This post is part of a series on cryptography in the browser. Previous posts have used the new Web Cryptography API to create and manage AES keys, and encrypt and decrypt strings. Now we will read a file, encrypt or decrypt it, and allow the result to be saved back in a new file. The next post will finish this first part of the series (that deals with symmetric cryptography) by putting all the pieces so far together into a working web page.
We start with an AES key object called aesKey already created, and a File object sourceFile, perhaps from an HTML input element. We will end up with a URL resultUrl that can be used to fetch and download the encrypted or decrypted file.
Step 1 – Declare variable to hold the URL when created, and set up a FileReader object:
var resultUrl;
var reader = new FileReader();
Step 2 – Specify what should happen when the file has been read in:
reader.onload = encryptTheFile;or
reader.onload = decryptTheFile;depending on which operation you want to perform.
Step 3 – Trigger the file to be read as an ArrayBuffer (which can be easily converted to a Uint8Array for processing).
read.readAsArrayBuffer(sourceFile);All the real work happens in encryptReaderResult or decryptReaderResult. They’re similar, but with some important differences. We need to create a random initialization vector for encryption and save it with the encrypted file, then extract it and use it later for decryption. A common convention is to write the 16 byte initialization at the start of the encrypted file, so it can be read first and used later for decryption. That’s what we’ll do.
function encryptReaderResult() {
    var iv = window.crypto.getRandomValues(new Uint8Array(16));
    window.crypto.subtle.encrypt(
        {name: "AES-CBC", iv: iv},
        aesKey,
        new Uint8Array(reader.result)
    ).
    then(function(result) {
        var blob = new Blob([iv, new Uint8Array(result)], {type: "application/octet-stream"});
        resultUrl = URL.createObjectURL(blob);
    }).
    catch(function(err) {
        alert("Encryption failed: " + err.message);
    });
}
There are a couple of new things in this code. First, note the coercion of read.result (an ArrayBuffer because that’s what we asked the FileReader to provide) to an array of bytes that we can encrypt. Second, we are creating a Blob out of two byte arrays (iv and the result of the encryption) and specifying its content type as application/octet-stream. The browser gives us a URL for that blob, which we can put into a link in the page in order to download its contents.
The decryption is very similar, except instead of putting the iv together with the rest of the file, we start by separating it from the encrypted file:
function decryptReaderResult() {
    var iv = new Uint8Array(reader.result.slice(0, 16));
    window.crypto.subtle.decrypt(
        {name: "AES-CBC", iv: iv},
        aesKey,
        new Uint8Array(reader.result.slice(16))
    ).
    then(function(result) {
        var blob = new Blob([new Uint8Array(result)], {type: "application/octet-stream"});
        resultUrl = URL.createObjectURL(blob);
    }).
    catch(function(err) {
        alert("Decryption failed: " + err.message);
    });
}
The new thing here is the use of the Blob.slice method to address different parts of an ArrayBuffer, so we can pull the iv out of the beginning of the file.
That’s all the pieces we need. Next time (sooner than a week from now, I hope) I’ll show a complete web page to perform these operations.
July 5, 2014
Symmetric Cryptography in the Browser – Part 2
This post is part of a series on cryptography in the browser. My last post covered the basics of encrypting and decrypting with the Web Cryptography API, but had no practical use. That’s because you couldn’t save and later load the key you used, and you couldn’t get meaningful amounts of data into and out of the software. We’ll address the first of those needs now. When we created our encryption key we set the exportable parameter to true. If we hadn’t, the actual key would forever be hidden from us, which would be a good idea if there were an outside-the-browser way to manage it. As of now, there isn’t such a way, so we’ll manage keys in the browser. That requires exporting them to a format that can be saved and transported and importing them from those formats. The format we’ll use is a hexadecimal string, so our 128 bit (16 byte) key will be a 32 character string. We can export a key to a byte array using the window.crypto.subtle.exportKey method. This is a pretty easy method to use. It takes two parameters: the format you want to export to, and the key to export. It returns a promise that passes the exported key (as an ArrayBuffer) to its then method’s parameter. Assuming our AES key is in the variable aesKey, here’s how to get it into a viewable form:
var aesKeyBytes;

window.crypto.subtle.exportKey('raw', aesKey).
then(function(result) {aesKeyBytes = new Uint8Array(result);}).
catch(function(err) {alert("Something went wrong: " + err.message);});
When I try that in my browser with a defined aesKey, I get the following bytes: [51, 155, 145, 34, 55, 159, 162, 158, 253, 202, 19, 78, 139, 186, 51, 118] So I can see the actual key, but I’d rather look at it in hex. For example, 51 is 33 in hex, 155 is 9b, 145 is 91, and so on. I can convert a Uint8ByteArray to a hexadecimal string by converting each byte and concatenating them:
function byteArrayToHexString(byteArray) {
    var hexString = '';
    var nextHexByte;
    for (var i=0; i<byteArray.byteLength; i++) {
        nextHexByte = byteArray[i].toString(16);  // Integer to base 16
        if (nextHexByte.length < 2) {
            nextHexByte = "0" + nextHexByte;     // Otherwise 10 becomes just a instead of 0a
        }
        hexString += nextHexByte;
    }
    return hexString;
}
Given the aesKey and aesKeyBytes shown above, byteArrayToHexString(aesKeyBytes) returns "339b9122379fa29efdca134e8bba3376", which I can easily display and save. Going the other way is pretty easy now. We will use the window.crypto.subtle.importKey method, after first converting a hex string to a byte array with this function:
function hexStringToByteArray(hexString) {
    if (hexString.length % 2 !== 0) {
        throw "Must have an even number of hex digits to convert to bytes";
    }
    var numBytes = hexString.length / 2;
    var byteArray = new Uint8Array(numBytes);
    for (var i=0; i<numBytes; i++) {
        byteArray[i] = parseInt(hexString.substr(i*2, 2), 16);
    }
    return byteArray;
}
Trying it out, hexStringToByteArray("339b9122379fa29efdca134e8bba3376") returns [51, 155, 145, 34, 55, 159, 162, 158, 253, 202, 19, 78, 139, 186, 51, 118], which is what I started with. Now that we have the array of bytes, we’re ready to import it to create a key. The importKey method takes all the same parameters as createKey, plus the key’s bytes and format of those bytes, so the steps to use them are almost the same:
var importedAesKey;

window.crypto.subtle.importKey(
    "raw",                          // Exported key format
    aesKeyBytes,                    // The exported key
    {name: "AES-CBC", length: 128}, // Algorithm the key will be used with
    true,                           // Can extract key value to binary string
    ["encrypt", "decrypt"]          // Use for these operations
).
then(function(key) {importedAesKey = key;}).
catch(function(err) {alert("Something went wrong: " + err.message);});
Now that we can get keys in and out of our code in a human readable form, we’re ready to actually encrypt and decrypt files. The next post will encrypt or decrypt a File into a Blob that can be downloaded. Then we’ll put it all together into a complete web page that performs all these functions.
June 22, 2014
Symmetric Cryptography in the Browser – Part 1
I’m going to start exploring the Web Cryptography API with just about the simplest use case I can think of: symmetric encryption with AES. The user will select a file, have the browser encrypt it, and download the encrypted file. Or select an encrypted file, have the browser decrypt it, and download the plaintext.
The cryptography API is provided in the browser by the window.crypto object. Almost all of the functionality currently available is provided by methods of the window.crypto.subtle object, so named “to reflect the fact that many of these algorithms have subtle usage requirements in order to provide the required algorithmic security guarantees.” That means that this API will do the crypto right, but you’re on your own to use it properly in order to have a secure solution.
Encryption is performed with the encrypt method (guess what method does decryption), but we can’t just jump in and use it. The encrypt method takes a specification of the algorithm to use, a key, and the original plaintext as parameters, and returns a promise. The ciphertext is provided to the function given to that promise’s then method. So before we can do anything else, we need a key. For this API, keys are opaque objects that must be manipulated through API methods. You can’t just use a binary string. We can either import an existing key or generate a new one. We’ll do the latter first.
Keys are created using the generateKey method, which returns another promise. The first parameter describes the kind of key to generate, the second says whether or not you can extract the actual binary key from it, and the third is an array of the purposes of the key. So, to get a 128 bit key to use with the Advanced Encryption Standard in Cipher Block Chaining mode, we’d use:
var keyPromise = window.crypto.subtle.generateKey(
    {name: "AES-CBC", length: 128}, // Algorithm the key will be used with
    true,                           // Can extract key value to binary string
    ["encrypt", "decrypt"]          // Use for these operations
);
This will try to create a new, random key, and pass it to the promise’s then method. We will just save it for now:
var aesKey;   // Global variable for saving
keyPromise.then(function(key) {aesKey = key;});
keyPromise.catch(function(err) {alert("Something went wrong: " + err.message);});
Assuming nothing went wrong, we now have a key stored in the aesKey variable that we can use to encrypt and decrypt data. So let’s try it with some dummy data. The encrypt method takes three parameters. The key we just generated is one of them. The plaintext to encrypt is another. And the remaining parameter is an object that specifies the algorithm to use and provides any needed options for encryption. For AES-CBC that object has the name “AES-CBC” and a property called iv, which is the initialization vector.
I’m not going to get into how AES-CBC works, just that it operates on blocks of 128 bits (16 bytes) each, and you need to provide a random 16 byte (128 bit) chunk called the initialization vector for it to be secure. So let’s start by getting a random block of data using window.crypto.getRandomValues:
var iv = new Uint8Array(16);
window.crypto.getRandomValues(iv);
Because getRandomValues returns the array it fills in, too, this could be written more consisely as:
var iv = window.crypto.getRandomValues(new Uint8Array(16));Unlike most of this API’s operations, getRandomValues is not asynchronous so it doesn’t require a promise. It just gets some cryptographically strong data and puts it in the array provided. Now we could perform encryption, if we just had something to encrypt. Let’s just put some text in a string for that:
var plainTextString = "This is very sensitive stuff.";Unfortunately, encrypt doesn’t take JavaScript strings, just blocks of memory, so we’ve got to copy the contents of the string to an array of bytes:
var plainTextBytes = new Uint8Array(plainTextString.length);
for (var i=0; i<plainTextString.length; i++) {
    plainTextBytes[i] = plainTextString.charCodeAt(i);
}
And now we can encrypt it, saving the ciphertext to a global variable:
var cipherTextBytes;
var encryptPromise = window.crypto.subtle.encrypt(
    {name: "AES-CBC", iv: iv}, // Random data for security
    aesKey,                    // The key to use
    plainTextBytes             // Data to encrypt
);
encryptPromise.then(function(result) {cipherTextBytes = new Uint8Array(result);});
encryptPromise.catch(function(err) {alert("Problem encrypting: " + err.message);});
Note that I have to convert the result into a Uint8Array. That’s because the encrypt operation returns an ArrayBuffer, which is just a chunk of memory. If I want to see what’s in it, I have to have a real typed array.
When I run this in the JavaScript console on my Chrome browser I get the following values for cipherTextBytes:
[93, 197, 31, 64, 100, 122, 144, 131, 57, 185, 92, 198, 185, 152, 106, 27,
151, 244, 48, 204, 12, 195, 49, 97, 148, 26, 165, 173, 127, 178, 56, 38]
A couple of things to note here. First, if you run the same code, you should get a totally different answer. That’s because we seeded the operation with a random initialization vector in order avoid some cryptanalysis techniques that could crack our encryption if we encrypted multiple plaintexts with the same key. Second, the string we started with was 29 characters long, but the cipherTextBytes is 32 bytes long. That’s because AES always encrypts 16 byte blocks, so the encrypt operation padded our original text before encrypting it.
Decrypting is nearly identical:
var decryptPromise = window.crypto.subtle.decrypt(
    {name: "AES-CBC", iv: iv}, // Same IV as for encryption
    aesKey,                    // The key to use
    cipherTextBytes            // Data to decrypt
);
var decryptedBytes;
decryptPromise.then(function(result) {decryptedBytes = new Uint8Array(result);});
decryptPromise.catch(function(err) {alert("Problem decrypting: " + err.message); });
After running this, I see the contents of decryptedBytes is:
[84, 104, 105, 115, 32, 105, 115, 32, 118, 101, 114, 121, 32, 115, 101, 110,
115, 105, 116, 105, 118, 101, 32, 115, 116, 117, 102, 102, 46]
We have to convert it back to a string to read it:
var decryptedString = "";
for (var i=0; i<decryptedBytes.byteLength; i++) {
    decryptedString += String.fromCharCode(decryptedBytes[i]);
}
And now when I look at that string, I see:
"This is very sensitive stuff."
Which is what we started with. The decrypt operation removed the padding that the encrypt operation had added, so we’re back to 29 characters.
This code works, but it’s not very useful. You’ve got to put the plainText into the program as a literal and the cipherText isn’t something you can easily display and save. Much worse is that the key and initialization vector aren’t saved, so you can only decrypt things if you haven’t closed the browser window. If you close it and reopen it you’ll get a new key and new initialization vector, which are useless for decrypting old ciphertexts.
My next blog entry will deal with these problems, creating a web page and actually useful JavaScript code for encrypting and decrypting files.
June 19, 2014
Exploring the new Web Cryptography API
I’m very interested in doing cryptography in the browser for things like end-to-end sealing of data and digital signatures. It’s been possible to do some of these things, but not practical. The W3C’s new Web Cryptography API should change that. I’ve been following its progress with interest, and just discovered that it has been partially implemented in Internet Explorer 11 and Google Chrome 35 (behind an experimental flag). So I’ve started fiddling with it, and I’m going to put notes here in my blog using the webcrypto tag.
Before I could really do anything with the API, I needed to get familiar with a couple of new JavaScript features: Typed Arrays and Promises. You can follow those links for more background, but here’s what I needed to understand:
- Typed arrays are similar to arrays in more traditional programming languages like C, where every element of the array must be of the same type. It seems they’re always implemented as contiguous blocks of memory, making them much faster for low-level operations than regular JavaScript arrays. The only kind of typed array we seem to need for cryptography is Uint8Array, arrays of unsigned 8-bit integers. That is, arrays of bytes.
- Promises are JavaScript objects to help work with asynchronous operations. Instead of giving a callback function when you request an asynchronous operation, you’d just have the operation return a Promise. You invoke the Promise’s then method to provide a function to call when the operation is done. If the operation is finished before you call then, that’s fine. The result will be held until then is eventually invoked. You can pass two functions to then if you’d like: the first is called with the result of the asynchronous operation if it succeeds, and the second is called with the error if it fails. Or you can handle errors by passing the error handler to the Promise’s catch method instead. The result returned by calling then is another Promise, making it easy to chain Promises to perform asynchronous operations serially.
Examples:
The statement var b = new Uint8Array(1024); creates a data structure that can hold one kilobyte. You can work with each byte individually, as in b[25] = 72; b[26] = b[25] + 1; and so on.
Suppose the asynchronous operation doSomething returns a promise. Then you can do the following:
 var p = doSomething(param1, param2);

var p1 = p.then(handleResult, handleError);

p1.then(doSomethingNext, handleNextError);
A popular way to write this seems to be:
doSomething(param1, param2

).then(handleResult, handleError

).then(doSomethingNext, handleNextError);
Although I’m considering writing it like this (at least until I know a reason not to):
doSomething(param1, param2).

then(handleResult, handleError).

then(doSomethingNext, handleNextError);
I think that’s all the special background needed to use the API. In my next post I’ll work up to encrypting and decrypting files using AES in CBC mode symmetric encryption.
